I've decided not to post a recipe today. Instead, being the final MOFO, I decided to have some cocktails and celebrate the completion of a challenge. I didn't think I'd stick with it the whole month because I'm notorious for quickly losing interest in projects...this is why I do not craft or write. My intentions are good, my follow-through is often not. So, to the new friends I've made and the new recipes I've created and tried, here's to you.
I raise my mug of booze and celebrate this being done!

30 November 2010
29 November 2010
Kindness and Cookies -- Vegan MOFO #29

I am constantly astounded and humbled by the kindness of others. Today, I received a surprise package in the mail from someone. Well, the contents were a surprise, I was asked for my address. But, the point is that this is someone whom I've never met face-to-face; I know her only through Twitter. She's a lovely individual, always offering help and suggestions...and, now, cookies! She mailed me some absolutely delicious homemade cookies, which I have proceeded to devour. She also mailed me a spaghetti squash. I know, sounds funny, but we had a conversation a few weeks back about it. I've been unable to find it anywhere locally, and she remembered that. The surprise package was a simple reminder of how kind people are, and that we don't hear positive stories often enough. We're constantly barraged by negativity whenever we go out or watch television. So, I wanted to take today to do a special THANK YOU to a very kind and generous soul (you know who you are). One day, I'll return the kindness! Count on it.
28 November 2010
Green Smoothie Addiction -- Vegan MOFO #28

Green smoothies. THE drink of choice for choosy vegans. Well, not everyone likes the green smoothies. It has taken me a little while, but I actually crave their healthy goodness now. At first I could really only taste the raw spinach, but now I only notice the varied other fruits I add in. I add different stuff every smoothie, but here are the basics I put into every green smoothie:
- baby spinach
- pineapple
- banana
- golden flax meal
- 1 cup baby spinach
- 1/2 ripe banana
- 1 cup fresh pineapple
- 2-3 TB flax meal
- 5 fresh cranberries
- 10 fresh raspberries
- 1/2 honeycrisp apple
- 1/2 large bartlett pear
- 1 medium carrot
- 1/4 cup So Delicious coconut milk
- handful ice
- 1/2 cup water
27 November 2010
Chickpea Spinach Curry w/Tofu -- Vegan MOFO #27
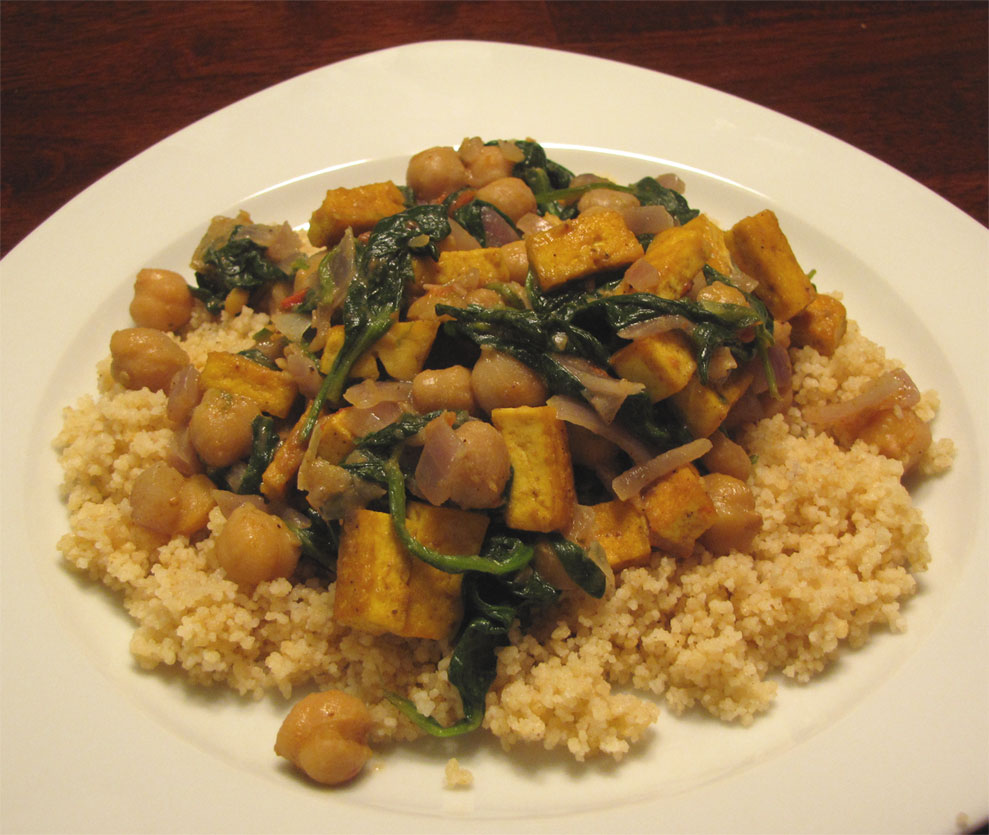
This is actually a recipe I devised a few days ago, but I had my posts all lined up already, so I decided to squeeze it in as soon as I could. It really turned out well. I have, surprisingly, never made curried veggies before. The day before I left to roadtrip it down to Nashville for T-giving, I found myself with a half-pound of baby spinach that I really didn't want to go to waste while I was gone. So, I sent out yet another distress call to my vegan foodie pals on Twitter. What on earth do I do with so much baby spinach? Make a curry, Paul says. So, I did.
Anyway, I made a curry. So, here it is. It's full of spicy goodness. I served my curry up with some whole wheat couscous. I'm not a fan of the super creamy curries, so I added only a little coconut milk, which I think helped to pull the whole dish together. The measurements of spices in this curry are approximate because I kept adding more til I got it spicy enough.
This dish would easily serve 2-3 people as the main dish.
Ingredients:
- 1/2 lb or so of washed baby spinach
- 1 can of chickpeas, drained
- 1 medium red onion, diced
- 1 small tomato, seeded and diced (optional-- mine seemed to disappear while cooking, so whatever)
- 1/2 block of tofu, pressed and diced
- 1/3 cup coconut milk
- 1 tsp cayenne pepper
- 3/4 tsp madras curry powder
- 1/4 tsp red curry powder
- 1/4 tsp garam masala
- salt & pepper to your tastes
- garlic powder or fresh garlic (I was out of fresh, so I used about 1/2 tsp of powdered garlic)
- 2 TB olive oil
- turmeric
- 1 1/2 cups cooked couscous, quinoa or brown rice
- In a nonstick skillet, drizzle 1 TB of the olive oil. Set the burner to medium heat. When the oil is hot, add your tofu, along with a sprinkle of turmeric, several dashes of cayenne and some yellow curry powder along with a smidge of salt and pepper. Toss to coat the tofu then cook until it starts getting crispy around the edges. Stir often to cook the tofu evenly. I think it took me about 8 minutes or so. Then set the cooked tofu aside.
- Return the skillet to the burner. Add the rest of the olive oil and saute your onions (and tomatoes, if using) until they are softened and translucent.
- Add the chickpeas and stir well. Cook about 3 minutes.
- Add the spinach on top of everything and cook until it wilts. I think it took me about 5 minutes. After 2 minutes, I started stirring the whole mix together. After the spinach is wilted, add the coconut milk and turn the heat up to medium-high heat.
- Add in the spices and mix very well. Let the milk cook down by at least half. Then add in the tofu that you already cooked. I tossed the curry a few times and let it simmer down until there was very little liquid in the pan. Check your spices again and add more as desired.
- Serve over some sort of starch -- I really liked it with the whole wheat couscous.
26 November 2010
Stuffed Mushrooms -- VeganMOFO # 26

I'm not gonna lie...these vegan stuffed mushrooms are KILLER. I could eat mushrooms pretty much every single day and never complain, so when I stumbled upon Vegan Piggy's recipe, I instantly became obsessed. Right after checking out the recipe, I went straight to the grocery store to get some more mushrooms. I've been trying to get back into cooking more healthy stuff again, and this recipe sure fits the bill. I've only had stuffed mushrooms with butter and cheese before, so this one is perfect for me. Not only did I have pretty much all the ingredients on-hand, but I got to use some of my delicious fresh basil that I've been growing.
You can use white button mushrooms if you want, but I used the creminis (aka- Baby Bellas). Look for the biggest ones you can get your hands on so they are easier to fill. Mine were primarily 2-inches in diameter. Just gently wiggle the stems to free them from the caps. I also just found some mushrooms at the grocery store that specifically say "Stuffing Mushrooms" and are about 3-4 inches in diameter, although I didn't buy those.
Here's the recipe with my adjustments/changes:
Ingredients:
- 1 lb mushrooms, stems removed (set about 1/3 to 1/2 of the stems aside and dice them, throw the rest away)
- 3 Slices of your favorite wheat or multigrain bread, lightly toasted
- 1/2 of a medium red onion, diced
- 3-4 cloves garlic, minced
- 2-3 TB extra virgin olive oil
- about 10-15 fresh basil leaves, minced
- any other fresh herbs of your choice
- sea salt and fresh cracked pepper to your taste
- Preheat oven to 375 degrees F. Brush 1 TB of oil onto the bottom of a glass 9x13-inch baking dish. Put the empty mushroom caps smooth side down onto the baking dish.
- Put your cooled, toasted bread slices into your food processor and whir until they become fresh bread crumbs.
- Heat the remaining oil in a skillet on medium-high heat. Once hot, add the garlic, chopped mushroom stems, and onion and saute for about 6-7 minutes until the onion is transparent. Stir occasionally so that nothing sticks to the pan.
- Remove from the heat and stir in the basil and fresh bread crumbs until the breadcrumbs absorb the oil and moisture from the onions. Mix in your salt and pepper.
- Spoon the mixture into the mushroom caps with a spoon, and press down gently into the caps so none spills out.
- Bake for 30-40 minutes. Don't let the mushrooms get too brown or they will burn. You will want your breadcrumb mixture to get slightly crisp on the tops. I topped mine with a bit of sea salt and served nice and hot. ENJOY!!


25 November 2010
Thanks -- VeganMOFO #25
Today is the American holiday of Thanksgiving. I don't celebrate the Pilgrims or any of that nonsense. I celebrate the day when my family gets together again-- when we gather in one place and love one another after months (and for some, years) apart. Sure, we share food and stories and laughter, but we also share bits of ourselves. Spending time with my family, no matter how hectic and stressful it can be, is time spent rebuilding myself and my identity. Driving 9+ hours to visit people I see twice a year is absolutely worth it -- it's like coming home after a very, very long day. Family is the place where you don't have to be ashamed to be who you are. You can unbutton your pants, have a belching contest, and watch Grandma kick everyone's asses at Skip-Bo or Yahtzee. Family is the place where you can share your history and your future. My family means the world to me.
Maybe I'm just lucky I was blessed with my family. I know that not everyone has it so good. And, for that, I wish everyone (whether with family, with friends, or quiet time alone) the best possible day. I have an amazing, wild, hilarious, caring, generous family and I love them all like crazy. I couldn't ask for a better clan.
I love you guys!
Meglet
24 November 2010
Cinnamon Pecan Pancakes -- VeganMOFO #24

What better way to start my day than with some incredible pancakes! My favorite hole-in-the-wall pancake joint closed up a while back and I haven't been able to find any pancakes that compare. Yesterday, that all changed. These vegan pancakes are moist, fluffy and killer tasty. I found the skeleton for the recipe here, but changed things to make them more flavorful and to use my on-hand ingredients. And, I have to say, these are the best pancakes I've ever had. I also added some golden flax meal for additional nutrients (click here for more info on flax). You can really get creative using the base recipe, adding other nuts, fruits, flours and spices. I happened to have some chopped pecans in my cupboard and a boatload of cinnamon, so that's what I used. I think cinnamon apple pancakes are in my future, though. I served mine with just a bit of Earth Balance vegan butter and they were so insanely killer. I'm sure they would be just as tasty with a little maple syrup drizzled over top, but I'm not much of a syrup kind of gal. These go great with the Potato Onion Hash that I made yesterday-- or probably any sort of breakfast-y potato.
If you've followed my blog, you'll know that I always toast nuts that I'm using in my recipes. I toss them into a skillet over medium heat for 4-5 minutes, stirring often. They start to become aromatic and that's when you know they're done. Watch them carefully, because they can burn easily. When done, remove from pan and set aside to stop them from cooking further. Toasting nuts brings them to an entirely new level of flavor, and they go perfectly in these pancakes.
This recipe makes about 6-7 DVD-sized pancakes.
Ingredients:
- 1 cup unbleached all-purpose flour
- 1 cup, plus 2 TB milk of your choice
- 2 tsp baking powder
- 3 TB sugar (I used 1 & 1/2 TB brown sugar and 1 & 1/2 TB granulated sugar)
- 1 egg replacement (I used Ener-G)
- 1 TB golden flax meal (optional - for additional healthy nutrients)
- 1/4 to 1/2 tsp vanilla extract
- 3/4 tsp cinnamon
- 1/3 cup chopped pecans, toasted
- 1 & 1/2 tsp vegetable oil
- In a large bowl, mix dry ingredients, except the nuts. In a medium bowl, combine all wet ingredients.
- Pour the wet into the dry, stirring until just combined. It will be a bit lumpy. If you keep stirring the batter here, the pancakes won't be fluffy. Now, gently fold the pecans into the batter.
- Heat a non-stick skillet over medium heat. Spray with a non-stick cooking spray or use a little dollop of your favorite vegan butter.
- Using a ladle or measuring cup, pour batter into pan. I used about 1/3 cup for each pancake.
- When the batter gets bubbles forming on the top (about 3 minutes), gently flip over with a spatula. Cook about 2 minutes longer, or until both sides are a nice, golden brown. Repeat until your batter is all gone.
- Serve these babies up nice and hot with a bit of vegan butter and a glass of juice. You absolutely won't regret it.
23 November 2010
Potato Onion Hash -- VeganMOFO #23

Sometimes a girl needs potatoes. Actually, sometimes a girl just really, really, really wants potatoes - and today was that day. So, I indulged myself this morning with this potato onion hash and some incredible cinnamon pecan pancakes. These potatoes are SOOO easy that anyone could make them-- literally. The hardest part is waiting for them to finish cooking because they smell SO delicious when they're cooking that you'll have a hard time not eating them straight from the pan. This recipe makes enough for 2 adults as a side dish.
Ingredients:
- 2 TB olive oil
- 2 medium-sized Idaho potatoes, peeled (see below for cutting instructions)
- 1/3 to 1/2 cup chopped onion
- 1/4 tsp garlic powder
- sea salt and fresh cracked pepper to taste
- Clean and peel your potatoes. Halve lengthwise. Put cut sides down and halve lengthwise again.
- Now, slice the potato quarters into even-sized slices. Be careful here to not cut any too thick because they will still be crunchy when the rest of the slices are done cooking.
- Heat your oil over medium heat in a non-stick skillet.
- Add in your potato and onion, and stir every 30 seconds or so to keep them from burning/sticking to the bottom.
- Add your salt, pepper, and garlic powder and stir.
- Cook until potatoes and onions are softened and browned to your liking, about 7-9 minutes. Serve up nice and hot...and try to resist the urge to eat them all before the they're done cooking!


22 November 2010
Frosted Pumpkin Cookies -- Vegan MOFO #22

Hear ye! Hear ye! Frosted Pumpkin Cookies have arrived.
No talk about this one. I'm getting straight to the recipe because you need to start cooking them ASAP. Your family and friends will thank you...and then beg you to make more (trust me...I live this). I should add that I got the basis for the recipe from VeganYumYum's iphone app, but changed it some to fit my tastes.
This makes about 18-24 cookies depending on the size you make them.
Cookie Ingredients:
- 1/4 cup vegetable shortening
- 1 cup sugar
- 1 & 1/4 tsp blackstrap molasses
- 1 tsp plus 3 drops vanilla extract
- 3/4 cup plus 2 TB pumpkin puree (I just buy it canned, but be sure to get plain pumpkin, not the spiced pumpkin)
- 2 & 1/4 cups unbleached all-purpose flour
- 1 egg replacment (I nearly always use Ener-G)
- 1 tsp baking soda
- 1 tsp baking powder
- 1/4 tsp salt
- 1/4 tsp nutmeg
- 1/4 tsp allspice
- 3/4 tsp ground cinnamon
- 2 1/2 TB vanilla flavored milk of your choice (I used almond, but I think I'll try coconut next time)
- 3 TB Earth Balance Margarine, room temperature-
- 2 oz. vegan cream cheese (1/4 of an 8 oz. package)
- 2 to 2 & 1/2 cups powdered sugar, add more if you like it extra thick and firm
- 1 tsp plus 4 drops vanilla extract
- Preheat oven to 375 degrees F. Line 2 cookie sheets with parchment paper or silicone mats
- Cream together shortening and sugar with a regular hand mixer (or stand mixer).
- Beat in molasses and vanilla until well combined.
- Blend in the pumpkin puree. The shortening will likely still leave tiny chunks and that is okay.
- Mix the rest of the ingredients together in a bowl, then slowly add it to the pumpkin mixture. Beat until well combined and quite stiff, sometimes you will need to add a little more flour. It seems that pureed pumpkin is sometimes more moist than other times. You just want the dough to be very thick.
- Check the dough for spices and adjust as necessary. I always always always do this. Sometimes, you need a little more of something.
- Scoop out onto cookie sheets at least an inch or so apart. Wet your fingers with a little water, then press the cookies down to about 1/2 inch thickness. This helps keep them from getting too tall as they do puff up a bit..
- Bake on middle rack about 12 minutes, but possibly longer. Use a toothpick to check the doneness. As soon as you remove them from the oven, slide the cookies onto a cooling rack to stop them from cooking more or getting crunchy on the bottom. Do not frost until they are cooled completely.
- Blend all ingredients together until nice and smooth. If it isn't thick enough, add more powdered sugar a few TB at a time until you reach a thick, yet smooth consistency.
- Wait until the cookies are nice and cooled before frosting otherwise the frosting will melt and drip off the cookies. Let frosted cookies sit uncovered for about 30 minutes to help the frosting set. Most often, I put them in the refrigerator to firm up the frosting. Then cover with plastic wrap to keep the cookies moist.
21 November 2010
Maple Walnut Roasted Apples -- Vegan MOFO #21

Fall is an absolutely gorgeous time in Michigan. The leaves start turning from green to yellow, orange and flaming red. The air turns crisp and the farmer's markets have an abundance of apples that you can get super cheap! It is the absolute perfect time to indulge in an apple buying binge...which is how I found this recipe in Vegetarian Times (2010, April). I was struggling to use up my apples, so I started scrounging around through cookbooks and food magazines for the perfect recipe. I did change a little bit of this recipe, but not much. The recipe below is for my version. This is for 4 servings (1 serving = 1/2 of an apple), but it is super easy to double/triple/quadruple/whatev.
For this recipe, I used 2 medium-sized Pinata/Pinova apples, but you can use any apple you want. I like to use a sweet apple that has a hint of tart. I also highly recommend using an apple corer, because it makes a pretty little circle in the apple instead of having to hack out the core with a knife. Also, definitely take a few minutes and toast your walnuts in a small pan. To do this, just turn your burner to medium heat and put your chopped walnuts in a skillet. Stir or shake them around every minute or two, until the nuts are fully heated through and you can smell them toasting. This should take about 4-6 minutes, so be careful to watch them because they can burn very quickly. Quickly remove from heat and set aside. I rarely use nuts in recipes without toasting them anymore. The heat brings out a more intense flavor to the nuts.
Ingredients:
- 2 medium or large apples, halved around the equator, washed, cored
- 1 tsp fresh lemon juice
- 1 TB brown sugar
- 2/3 tsp ground cinnamon
- 1/2 cup maple syrup
- dash of salt
- 1/3 cup chopped walnuts, toasted as explained above
- Preheat oven to 400 degrees F.
- Place the apples cut side up in a baking dish, and lightly drizzle the cut sides with half of the lemon juice.
- Combine brown sugar and cinnamon in a small bowl. Then, sprinkle the sugar and cinnamon over the cut sides of the apples.
- Pour maple syrup into the bottom of the dish, not on the apples, but around them. Cover dish with foil and bake 10 minutes.
- Remove foil and cook about 15 more minutes (or until apples are as soft as you like them). Then, transfer apples to a serving dish.
- Pour the syrup and pan juices from the baking dish into a small saucepan and heat on medium-high, adding the rest of the lemon and start whisking. Bring the syrup to a boil (takes about 3 minutes) and add the walnuts, still whisking. Let bubble up and thicken for about 2-3 minutes. Remove from heat.
- Using a spoon, drizzle the syrup and nuts over the apples, including the core holes. Serve nice and hot!


20 November 2010
Quick Pickles -- Vegan MOFO #20

One of my favorite things to munch is pickles-- salty, tangy pickles. So, when I went to a pal's house last summer and she had these pickles, I ate almost the whole bowl. These quick pickles take about 5 minutes to make and are ready to be munched within about an hour. They don't really hold up to sitting in the fridge for days, so make them about an hour before a meal.
Ingredients:
- 1 cucumber, thinly sliced (You can leave the skin on if you choose)
- 1/4 to 1/2 cup red onion, sliced or diced to your preferred size
- 1/4 cup white vinegar
- 1/4 cup sugar
- Salt and pepper to taste.
- Place your cucumber slices and onion in a large bowl.
- Add the rest of the ingredients and stir very well. I actually stir for about a minute, flipping the cuke slices around to make sure they all get in the juice.
- Cover with a lid or plastic wrap and refrigerate for 30-60 minutes, or longer if you choose. I usually can't wait the whole hour, and keep doing "quality control" checks to make sure they taste yummy. I know, I know, I made that up. I just can't keep my fingers out of the bowl. I have poor impulse control when it comes to pickles.
19 November 2010
Pierogies!! -- Vegan MOFO #19

Pierogies!! What more can I say? They're creamy, chewy and tasty as all get-out. You can't eat just one. They're versatile...add any ingredients you want into the filling. These are just what my Polish granny would make (if I had a Polish granny, which I do not).
You should know that this was my first time ever making pierogies, although I'm a life-long fan of them. The thing is, I only ever ate the frozen ones and the ones at a little pub outside of Pittsburgh. The frozen and pub varieties were tasty, but I really wanted a little more flavor out of them. So, for this batch, I added some finely chopped caramelized onions to the mashed potatoes. My mashed potatoes typically consist of lots of EB and salt and, occasionally, fresh garlic. OH, and another great thing to add to the mashed potatoes for these pierogi is some Daiya cheddar. Maybe 1/3 cup. Super yummy.
I've gotta say: these pierogies turned out fabulously. I made a big batch, but they're all gone -- there was some serious pigging out going on. Depending on the size you make the pierogies, the dough will make enough for at least 20 (I used a 3.5 inch diameter glass to cut my dough into circles) and had dough left. You can make your mashed potatoes any way that you want, so I'm not going to write up a recipe for that. You will need a couple of cups of mashed potatoes. I will share my friend's (@PaulEats from twitter) recipe for the pierogie dough. I don't think he'd care if I shared with you all. After filling the pierogies, you will need to boil them for about 3 minutes. Then you can either serve them as-is, or take a little cooking spray and fry them up a bit. I have to have them fried. I just love how it makes some of the dough crispy, yet still chewy and delicious.
Ingredients:
- 1/2cup + 2tbsp warm water
- 2c flour
- 1/4c oil,
- 1tsp salt
- 2 cups mashed potatoes, give or take

- In a large bowl, combine all ingredients until well combined with no dry spots. I used my hands to combine the ingredients into well-mixed ball.
- Cover and let rest for 30 minutes.
- I separated the dough in half and rolled out the first half to be about 1/8th of an inch thick.
- I took my glass and cut out circles. Peel away the excess and set aside to be reused.
- Take about 1 TB of mashed potato and place in the center of the dough rounds. Fold the dough and press the edges together, and seal. I dipped my finger in water and rubbed around the bottom half-circle of dough before sealing the pierogies. It seemed to make the sides stick together better. You can press the edges firmly with your fingers to seal or use the tines of a fork and press firmly. You want them to be sealed really well so potato doesn't come out during boiling.
- Repeat steps 3-5 until you use up your dough.
- Put a large pot of salty water on to boil. When it is rolling steadily, carefully put about 5 pierogies into the pot. I used a large slotted spoon to lower them in with no splashing. You'll boil them for about 3 minutes, or until they rise to the top. Repeat until all of your pierogies are cooked.
- You can set some aside to freeze and fry up later, but we were very hungry, so I started frying them up in a little cooking spray. I like to fry until just lightly browned and crispy on the top and bottom. I flip mine over several times throughout cooking to make sure they're cooked evenly. I fry in a nonstick skillet over medium heat. If these are freshly boiled, they take about 4-ish minutes to cook to perfection.
- Sprinkle with a little salt and pepper, or in my case, garlic salt and some pepper. I like them with a little sour cream, but some people use anything from sauerkraut to applesauce. Whatever floats your pierogie boat is cool by me.
18 November 2010
Review: Strawberry Basil Preserves -- Vegan MOFO #18

Holy yumminess, Batman. I found the holy grail of fruit preserves. Behold the Organic Strawberry Basil Preserves from a Michigan company called Food For Thought. I had never seen this jam, nor had I heard of the company until today. I stumbled upon it at a little gourmet food shop and my life will never be the same. You may be thinking, "Strawberries are sweet and Basil is more savory...this is an abomination." But you would be wrong...so very, very wrong. This stuff is heaven in my (and probably your) mouth. I sped home and started toasting bread before I even put my handbag down. No joke, I was that excited. Strawberries and basil are two of my most favorite flavors, so I couldn't resist having them combined into one. The flavor is seamless. No strange flavors standing out, just a perfect, smooth, sweet combo. Just talking about it makes me want to eat some more.
I tried the preserves first on some multi-grain toast and my mind was officially blown. Then, I tried it on some plain crackers, again, WOW. And finally, I ate a spoonful straight from the jar. All were amazing. I bet it would even be good mixed into a vinaigrette. Better yet, just hook me up to an IV. I could eat this stuff every day. They have another flavor that I'm dying to try now: Blueberry Lavender. Maybe next time, my sweet obsession.
You should know that this post isn't sponsored by Food For Thought. I just happened to buy their product on a whim and I can't recommend it enough. You can order directly through their website, or find them in co-ops and organic shops in Michigan and possibly other places, as well.
17 November 2010
Pineapple Smoothies & the New Vita-Mix -- Vegan MOFO #17

Alright. I've been eyeing the Vita-Mix for about 2 years. I really wanted one, especially for smoothies. The local shop charges $5.00 for a smoothie, and it can be pretty expensive if you want to customize or add any mix-ins, like nuts. So, I got a different blender in the meantime, which subsequently can barely chop ice, let alone make a smoothie that's (ahem) smooth. I started doing more research (read: asking my Twitter pals and watching endless videos online) and finally decided to take the plunge. I ordered a factory refurbished model through the Vita-Mix website under "online specials." The refurb still comes with a 7 year manufacturer warranty, which is excellent because my old blender had a 6-month limited warranty. The mixers are expensive, but I've had mine for a day and a half and I'm already in love and made 2 wonderful smoothies. Just so you know, Vita-Mix isn't sponsoring me or anything. I paid for the mixer myself and this mini review is from the heart.
So, here's my first smoothie recipe. I warn you in advance, it is a bit tart which is how I love them. But feel free to add some sweetener of your choice. I you are using frozen fruit, you don't need to add the ice. I used fresh fruit this time, so I added ice. This recipe makes 2 medium-large glasses full.
Ingredients:
- 1 cup fresh or frozen pineapple
- 1/2 banana
- 1-2 TB fresh lime juice
- about 8 fresh cranberries
- 1 1/4 cups ice
- 1/2 cup water
16 November 2010
Halfway through Vegan MOFO (#16)
Wow! I honestly can't believe I've made it through the halfway point of Vegan MOFO 2010. I was optimistic, yet realistic about how often I would post and whether I had the gumption and drive to make it through. I'm not really good with self-regulating my blogging, especially when the blogs need to be done everyday. I'm just really glad I've stuck with it. I have learned SO much doing participating in this blog challenge. And I've made so many great new dishes myself...like finally discovering the joy that is the tofu scramble. YUM.
Over the last week I think I've bookmarked more recipes for dishes than I have in the last several months all put together. I've been seeing layered vegan meat cakes, tater tot casseroles, green smoothies, Caribbean mango dishes and so much more. I really really LOVE the creativity in peoples' dishes and their willingness to share their knowledge and their recipes! And I love finding new food blogs to follow and get inspiration from. On top of the sharing, many of these bloggers are on Twitter and are happy to discuss their recipes and and answer questions. Vegan MOFO has really opened my eyes to the community of vegan bloggers-- and not just the food bloggers, but the lifestyle and AR bloggers, too. What an amazing community, and I'm honored to be a part of it.
I was so inspired by everyone's love of the green smoothies and their Vita-Mixes that I ordered my very own Vita-Mix last Friday. I'm so excited to start trying out the smoothies and soups and nut butters that were just about impossible to create in my old blender. So, hopefully, it'll get here later this week or early next week and I'll be able to start sharing my creations, too.

Where I'd rather be today.
15 November 2010
Penne alla Vodka -- Vegan MOFO #15

Skimming around the internet today, I came across a number of recipes for vodka sauce, none of which were vegan, so I jumped at the chance to give the sauce a tasty makeover. I learned the basics of making the sauce and set out on my own to make a yummy recipe for the rest of us. I think this recipe turned out spectacularly flavor-wise, but it didn't quite reach the creaminess level I was hoping for. I ended up not "cooking down" the tomatoes far enough because I was very hungry and impatient as I always seem to be whenever I start cooking. Well, enough talk. Let's get started.
Here are a few tips for my version of Penne alla Vodka:
- Chill out and don't "pull a Meg." Give the tomatoes and vodka enough time and heat to cook down by about half, eventually they will.
- I used Muir Glen Fire Roasted diced tomatoes and I highly recommend them because they have a ton more flavor than plain diced tomatoes.
- I used soy creamer instead of dairy heavy cream, so that its not quite as thick as heavy cream would have been. If you're really craving a super creamy sauce, you could cook down the creamer in a saucepan and whisk in a tiny bit of flour. I haven't tried it with this recipe, but I have done it in other creamy recipes.
- You can leave the sauce chunky if you want, it'll still be great, but I've always had vodka sauce that was almost totally pureed. I used a hand-held immersion blender to smooth out the sauce, leaving a few small chunks. You could put the completed sauce in your regular blender or food processor to reach the same result.
- Serve with some garlic bread. Man-oh-man. The garlic bread dipped in the vodka sauce is quite literally a mouthgasm.
Ingredients:
- 1/2 lb penne, uncooked
- 1 TB extra virgin olive oil
- 1 small onion, diced
- 3-4 medium cloves garlic, minced (I used 4 because I LOVE garlic)
- 1/3 cup soy creamer or you could also use your favorite milk, thickened on the stove
- 1 14-oz can of diced tomatoes and their juices (I used the fire roasted diced tomatoes mentioned above)
- 1/4 cup vodka
- 1/4 to 1/2 tsp red pepper flakes
- 1 1/2 tsp dried basil (I would have used fresh if I would have had it)
- 1 tsp garlic powder
- 1 tsp onion powder
- sea salt and cracked pepper to taste
- In a large saucepan, heat the oil and red pepper flakes over medium heat. Heat about 3 minutes.
- Once the oil is nice and hot, add your onions and stir around. Cook about 5 minutes, until the onions are translucent and softened.
- Then add in the garlic and cook another 2 minutes.
- Add in the vodka and tomatoes with their juice. Be careful here. If your pan is too hot, your vodka may catch fire. I added the vodka slowly to avoid that. Add the basil, onion powder and garlic powder and mix well. Then bring to a boil until the liquid cooks down by half. I probably cooked mine about 10 minutes on medium heat, which wasn't long enough. You could also turn up the heat to speed this up a bit.
- Bring a separate pot of salted water to a boil. Add your pasta and cook according to the package directions.
- After your tomato sauce thickens, stir in your creamer. Cook about 5-10 minutes, stirring occasionally. I brought mine back to a boil for a bit while I cooked my pasta.
- Drain pasta and put into a large bowl. I dropped a TB of Earth Balance onto the pasta and tossed it gently.
- Pour your sauce onto the pasta and gently toss to coat all of the noodles. Serve up with some garlic bread and enjoy :)
14 November 2010
Double Chocolate Pecan Cookies -- VeganMOFO #14

By popular demand, I am sharing my ultra-top secret recipe for my vegan Double Chocolate Pecan cookies. They taste like brownies, but come in convenient cookie size. If you add a tiny bit more flour, they stay more brownie-like in consistency, add a bit more butter, and they get a bit thinner and crispier around the edges. I like them both ways, so this recipe is sort of an in-between of the two. I always toast my pecans in a skillet over medium heat for about 4-5 minutes stirring often so they don't burn. It brings the taste of the pecans to an entirely new level. You can also cut the salt amount in half, but I love a tiny hint of salt taste to accompany the sweet chocolate taste. But, maybe that's just me. And, since the batter has no raw eggs, feel free to eat a bunch and only bake a little. It's really that good. Everyone who's tried these amazing cookies has begged for more, omni or not. So, I think it's safe to say that I rule for creating them. HAHA. I crack me up. But, really, they are freaking wonderful.
This recipe is for 18-25 cookies, depending on the size you make them.
Ingredients:
12 November 2010
Quesadillas & Guacamole -- VeganMOFO #12

I made a pot of delicious soup yesterday and, yes, I do have leftovers to eat. But, I got an idea in my head that I just couldn't get out. I needed to make a quesadilla...yes NEEDED. I already had all the supplies here: Daiya, tortillas, vegetarian refried beans, and an avocado that was quickly becoming too ripe. Avocados are around $2.00 each here, and I just can't let them go to waste.
Actually, I hate letting any food go to waste, especially after reading about the huge amount of food wasted in the US - food that could go toward feeding the hungry. And, truthfully, I worked hard for my grocery money and I don't want to throw it in the trash. Avoiding food waste also makes me get creative with my meals because I start putting stuff together that I may not have thought of before. I put a bit of lettuce on my quesadilla tonight and I wouldn't have thought of it if I hadn't been trying to use up some leftover iceberg.
This recipe makes 2 six-inch quesadillas.
Ingredients:
- 4 six-inch flour quesadillas
- 1/2 of a can of vegetarian refried beans (the "traditional" beans have lard in them...ick)
- 1 ripe avocado, peeled, seeded and mashed in a bowl
- 4 green onions, sliced into rounds (I used the white and light green parts only)
- 2-3 white button mushrooms, thinly sliced
- 1/3 cup of Daiya shreds, but you can use any brand and amount that makes your happy (I used the cheddar and mozzarella combined)
- 1/4 cup salsa of your choice
- 1/2 tsp lemon juice (optional)
- Mash your avocado in a bowl with a fork. Add about half of the green onions and the salsa. It's my guacamole cheat for when I don't plan it out better. Add the lemon juice and mix well. Set aside.
- Lightly spray a nonstick frying pan.
- Spread half of the beans on one tortilla and half on another. Put one of them in the frying pan, bean side up, obviously. Sprinkle some mushrooms and green onion on the beans, and gently press them down. Then add half of the Daiya and top with a tortilla.
- Cook over medium heat for about 3 minutes, then carefully flip the quesadilla over and cook another 2-3 minutes, or until your tortilla is golden and a bit crispy on each side. Here's where I added the lettuce. I very gently peeled the tortillas apart and slipped some lettuce inside and put it back together again. It gives the quesadilla a nice bit of crunch.
- Repeat the process with the other tortillas. I've found that the easiest way to cut quesadillas is with a pizza cutter. Serve with the cheater's guacamole.

11 November 2010
Garlicky Chickpea Spinach Soup -- VeganMOFO #11

After searching the internet, specifically FoodGawker, I came across a delicious-looking recipe for a chickpea garlic soup on Needful Things's blog. It looked a bit creamy, which actually scared me a little because the recipe called for cream. Well, eating vegan means no cow's milk, which means no cream. So, I sent out a distress call on Twitter and had an overwhelming response from numerous tweeters (I love my Twitter peeps!). One in particular stood out: @EpicurVegan said to try coconut milk as a replacement, which was promptly seconded by a few other folks. If Twitter pals say it, it must be true, right?
Like the original source for this soup recipe says, it's good for cleaning out your fridge! I used up half a bunch of spinach that was headed south and a couple of Idaho potatoes from my fridge and some onion and garlic from my counter top. Even better was the fact that I had a can of reduced fat coconut milk sitting in my cupboard waiting patiently to be used. I bought it on a whim and never even thought about how I would use it. So, it was perfect!
I definitely altered the recipe in several ways, so I will post my version here. I added quite a bit more spice because that's just how I roll. I loooooove spices. I also added more garlic and tahini. Anywhoooo, here's the recipe.
Ingredients:
- 2 TB extra virgin olive oil
- 5 cloves garlic, minced
- 1 yellow onion, diced or roughly chopped
- 2 1/2 tsp ground cumin
- 2 tsp ground coriander
- 1 tsp onion powder
- 1 tsp garlic powder
- 1 tsp garlic salt
- 5 cups vegetable broth
- 2 average-size Idaho potatoes, scrubbed and diced small (about 1/3 inch cubes)
- 1 (15 ounce) can chickpeas, drained and rinsed
- 3/4 TB cornstarch
- 2/3 cup reduced fat coconut milk
- 2 1/2 TB tahini
- 1/2 bunch of spinach - about 6-8 oz-, stems cut off and shredded (don't forget to wash very well!)
- 1/2 tsp cayenne powder
- 1 tsp fresh cracked pepper
- 1 tsp sea salt
- Heat oil over med-high heat in a stock pot or very large sauce pan. I used an enameled cast iron stock pot.
- After heating for 2 minutes, I added the onion. Cook, stirring occasionally for 5 minutes, or until softened. Then add your garlic and stir again. Cook 1-2 minutes.
- Add in the dry spices. Stir.
- Add the broth and potatoes. Bring to a boil for about 10 minutes. Then add in the chickpeas. Cook another 5-ish minutes. Check your potatoes. You want them to be fork-tender. Not hard, but not mush either.
- In a bowl, whisk together the coconut milk, cornstarch and tahini. Once it is all combined, stir the mixture into the soup and add the spinach. Cook about 3-4 minutes so the soup thickens and the spinach wilts. Check the flavor and add more spices as necessary. I added a bit more garlic salt and a dash more cumin. We ate ours with some garlic bread because nothing goes better with a garlicky soup than garlic bread! The crust is perfect as a soup crouton. Enjoy!!

10 November 2010
Gingerbread Waffles -- VeganMOFO #10

Breakfast...something I don't always eat.
Waffles...something I LOVE.
Fresh ginger...something I had lying in my fridge.
Put 'em together and you get a damn fine breakfast treat.
I slightly adapted this recipe from Vegan Brunch by Ms. Moskowitz. I ended up adding a bit more flour and more cinnamon, a dash of ginger powder and (accidentally) more molasses. These waffles are seriously killer. I don't really like sweet breakfast because it gives me a tummyache, but these waffles were perfect; a hint of sweet. I am not a big fan of syrup on my waffles, or on anything for that matter, so I just slather a little --okay, kind of a lot-- of Earth Balance on any waffle I eat. But, actually, these gingerbread waffles needed only a smidge. My idea smidge may be larger than yours, but you get the point. I cut the original recipe in half, and ended up with 4 five-inch round waffles. So, I will share the halved and altered version and you can feel free to double or triple or whatever.
Ingredients:
- 1 cup plain almond milk (or your fave milk)
- 1/2 tsp apple cider vinegar
- 1 1/2 TB canola oil
- 2 slightly overflowing TB molasses (I used blackstrap because that's what I had on hand)
- 1/4 cup brown sugar
- 1/2 tsp vanilla extract
- 1-inch chunk fresh ginger, peeled and grated (I so LOVE my microplane for this)
- 1/4 tsp salt
- 1/8 tsp powdered ginger
- 1 1/4 cups all-purpose flour
- 1 tsp baking powder
- 1 tsp cinnamon
- 1/8 tsp ground clove
- Preheat your waffle iron. I always use a cooking spray even though my iron says it's nonstick. I use it before I put batter in each and every single time. Otherwise the top of your waffle sticks to the top of your iron.
- In a large mixing bowl, use a fork to mix the milk, oil, vinegar, molasses, vanilla and brown sugar. Mix until the color is homogeneous.
- Add the rest of the ingredients and mix together until mostly smooth. There can be some really small lumps, they'll usually dissolve as they cook.
- I poured 1/2 cup of batter into the center of my sprayed waffle iron and let it spread itself out naturally. Then closed. I had mine on setting 5 out of 8, and it beeps to let me know when it's done. But, follow your waffle iron's cooking directions because they all cook at different times and temperatures. Also, resist the urge to open the lid before the time is up, because it will split your waffle in half and that is definitely not good.
- Slather with a bit of Earth Balance and tuck in.

09 November 2010
Comfort Food -- Vegan MOFO #9

Isn't that a gorgeous head of yellow cauliflower? I think the farmer called it cheddar cauliflower. To me, it tastes just a smidge more sweet than plain white cauliflower. While this tasted fabulous raw and oven-roasted, I think I still like the white kind better.
Everyone needs comfort food sometimes; foods that make them feel all warm and snuggly inside. That was me today, which was perfect because I had some broccoli and cauliflower that were starting to head south, and I hate wasting food. I also had some Idaho potatoes in my fridge that I kept forgetting about, so I made a few of them into a super yummy, salty and buttery mash. I don't have any real recipes for this dinner, though.
What we had for dinner:
- Oven-roasted yellow cauliflower
- Steamed veggies--broccoli, yellow cauliflower, carrots
- Super yummy mashed potatoes
- Gardein Crispy Tenders with a dash of garlic salt
For the mashed potatoes, I peeled 3 medium sized Idaho potatoes, then cut them into 1/2 inch cubes. I boiled a pot of salted water, then added the potatoes. Cook about 8-10 minutes, or until the potato cubes are fork-tender. Then drain and put in a deep bowl. Add a bit of your milk of choice, maybe 2 TB. Add about 4 TB Earth Balance and 1 1/2 tsps of salt. I blend mine by hand mixer, then add more salt or butter as necessary.

08 November 2010
3-Layer Tortilla Casserole -- Vegan MOFO #8

This recipe makes 4 large servings or 6-8 small ones.
Ingredients:
- Cooking spray
- 1 can black beans, drained and rinsed
- 1/2 cup vegetable broth (I had vegetable stock so I used that instead)
- 3 garlic cloves, minced
- 1/2 tsp cayenne pepper
- 1 tsp chili powder
- 1 medium red onion, diced
- 2 cups diced zucchini (I used half yellow squash and half zucchini)
- 1 cup frozen corn
- 1/3 cup diced bell pepper
- 1 tsp cumin
- 1-2 TB fresh cilantro, chopped
- 3 8-inch whole wheat tortillas
- 3/4 to 1 cup of your favorite chunky salsa
- Salt and fresh cracked pepper to your liking
- 1/4 tsp garlic powder
- 1/4 tsp onion powder
- Preheat your oven to 350 degrees F. Spray a 9-inch pie pan with cooking spray and set aside.
- Using a food processor, puree the beans, garlic, 1/4 cup vegetable broth and cayenne pepper. Blend until smooth and thick.
- Heat the remaining 1/4 cup of broth in a large skillet (I used my cast iron skillet). Add the onion, bell pepper and zucchini and saute for 5-6 minutes, until the onions are translucent and pepper and zucchini are softened somewhat. Be sure to stir the veg regularly so none sticks to the bottom of the pan.
- Add the corn, cilantro, cumin, chili powder, salt, pepper, and the onion and garlic powder (if using).
- Place 1 tortilla in the bottom of the pie. Spread 1/3 of the pureed bean mixture onto the tortilla.
- Scoop 1/3 of the sauteed veg onto the beans.
- Scoop 1/3 of the salsa onto the top of the veg mix.
- Place a tortilla on top of the salsa, and press down slightly to even out the layer and make it smoother. Then repeat the process 2 more times. Until your casserole is 3 layers tall and looks like this:
- Bake uncovered for 25-30 minutes. Cut into quarters and use a pie server to get the pieces out of the pan more easily. This casserole is great by itself, but it also goes really well with brown rice. Maybe next time I'll make some guacamole to put on top of the casserole when I serve it..I think that would be lovely :)


07 November 2010
Week 1 Vegan MOFO Treat! (Psst-- they're cookies) #7

After a week of healthy eating, I needed a little treat. A sweet, slighty not-good-for-you treat. Dammit, I needed some cookies. While not good for your body, cookies are definitely good for your soul! This recipe was adapted slightly from Robin Robertson's Maple-Walnut Oatmeal Cookies (pg 430 of 1000 Vegan Recipes). These don't have any raisins, but I think they would be pretty tasty. Actually, you could probably add some dried cherries or cranberries instead of raisins, if you wanted. Enough talk, on to the cookies!
This recipe makes 1 dozen cookies. Just double or triple if you want more.
Ingredients:
- 3/4 cup all-purpose flour
- 3/4 cup old-fashion oats (also called rolled oats)
- 1/2 tsp baking powder
- 1/8 tsp salt
- 3/4 tsp cinnamon
- 1/8 tsp nutmeg
- 1/2 cup chopped walnuts (I toasted mine slightly in a skillet before adding to the cookies-gives lots of extra flavor)
- 1/4 cup plus 1 TB cup Earth Balance or other vegan butter
- 1/4 cup pure maple syrup
- 2 TB sugar (I used 1 TB brown, 1 TB white)
- 1 tsp plus a few extra drops vanilla extract
- Preheat oven to 375 degrees F.
- Line a cookie sheet with parchment or a silicone mat.
- In a large mixing bowl, mix together flower, baking powder, salt, cinnamon, nutmeg, oats and walnuts.
- Melt your butter, then stir in the syrup, sugar, vanilla. Mix well. I melted my butter in a microwave-safe bowl for 30 seconds. Then added the other ingredients into that bowl.
- Add the wet ingredients to the dry, stirring gently until there are no dry spots. If you wanted to add in some raisins or other dried fruit, now would be a good time to fold them in.
- Using a small scoop or tablespoon, drop the cookies onto your cookie sheet. Cook on the middle rack for approximately 12 minutes. You want to pull them out when the bottom edges are lightly browned. Let cool 5 minutes on a rack. Enjoy :)

06 November 2010
I Made It! Week 1 of Vegan MOFO (#6)
.JPG)
In celebration of making it through my first week of Vegan MOFO 2010, I decided I'd skip posting a new recipe and go out to breakfast with my momma instead. We love the Flint Farmer's Market so so so much, and they have a fabulous little family-owned diner upstairs called Steady Eddy's. Well, Steady Eddy's is one of the very few restaurants in this area that offers not only vegetarian, but vegan dishes, although they are not strictly a vegetarian diner. And hallelujah for a not having to explain what veganism is! They're only open when the Farmer's Market is open, and the wait is sometimes kind of long, but I swear to you, it is absolutely worth the wait. In the summer, they have their patio open, so you can eat outside and look down on the Market shoppers. It's lovely, especially when all of the vendors are selling flowers during the summer months.
Anywhooo... I decided to order the tofu scramble, which is seasoned tofu mixed with brown rice with a side of toast and a bit of fresh fruit (orange, pear, banana, pineapple, and some grapes). It was divine. No joke. I already posted the before shot above, and here's the after:
.JPG)
So, tomorrow I'll maybe try a new cookie recipe or some such sweet treat since I've only blogged about relatively healthy vegan dishes. It's time to indulge in a bit of vegan dessert. Any ideas what I should try?
05 November 2010
Tortilla Lime Soup -- Vegan MOFO #5

Tortilla Lime Soup after adding Rice, Avocado and Tortillas
Terrible photo, I know. But, it was Girl's Night In at my place and I didn't have time to get all arty with the soup pics. I'll try to get a better pic tomorrow with the tiny bit of leftovers. This was my first time trying this exact recipe and it was a HUGE success among my non-vegan friends. No one even mentioned that the chicken was "missing." I really like my soup with a kick, so I added cayenne pepper and chili powder to the pot. This soup is absolutely fabulous and almost completely fat-free (at least it is if you don't add the avocado chunks). There is something really perfect about dicing an avocado small and dropping them into your soup when you're about to tuck in. They're creamy and perfectly balance the acidity of the soup. I definitely recommend trying it for yourself. Another of my favorite things is to add some cooked brown rice to my bowl of soup when I'm serving it. I seem to always have cooked brown rice in my fridge, so I popped it in the microwave when the soup was almost done cooking. It gives the soup a really nice texture.
Which brings me to the next part. I emphatically LOVE making my own tortilla chips for this soup. They taste better than the greasy ones from the store. It's super duper easy. Cut the tortillas (corn or flour--I like the flour best) into strips or wedges. Lay in a single layer on a cookie sheet. Spray tops lightly with some cooking spray, and sprinkle sea salt on them. Pop them in a 350 degree F oven for about 10 minutes, or until they are crispy and lightly browned. I make them when the soup is almost done and serve them hot.
Ingredients: Serves 5-6
- 5 cups vegetable broth
- 1 14-oz can diced tomatoes, drained
- 1 medium-size red onion, diced
- 2 heaping TB finely-chopped cilantro (or more if you like it a lot)
- 3 TB fresh lime juice
- 1-2 fresh serrano chiles, seeded and minced
- 4 cloves garlic, minced
- 1 TB olive oil
- 1/4 cup salsa verde (or a 4-oz can of diced green chiles)
- 1/2 tsp chili powder
- 1/2 to 3/4 tsp cayenne
- 1/4 tsp cumin
- 1/2 tsp onion powder
- 1/4 tsp garlic powder
- 1 tsp sea salt
- 1/2 to 3/4 tsp fresh cracked black pepper
- 1 avocado, diced (optional, but highly recommended)
- 4-5 flour or corn tortillas cut into strips (optional) Or store-bought tortilla chips
- Start by getting your soup pot on the stove and turning to medium heat. Add in your oil and warm for at least 2 minutes.
- Add in the onion and cook about 4-5 minutes. Then, add in the garlic and chilies. Stir well and cook about 3 minutes.
- Add the broth, tomatoes and salsa verde and mix. Then add your spices, cilantro and lime juice, adding the cayenne just a bit at a time if you're conservative with the spiciness.
- Turn up the heat and bring to a boil. Once it starts boiling, turn the heat down to medium-low and cover. Let simmer about 20 minutes. Adjust your spices. I added a dash of garlic salt to mine.
- After your soup has been simmering away for 10 minutes, cook your tortilla strips.
- Serve up your soup with the rice and some avocado cubes. I like to use the cooked tortilla strips like crackers, adding a bit of crunch to my soup. I hope you enjoy :)

Tortilla Lime Soup pre-Rice, Avocado & Tortilla
04 November 2010
My First Tofu Scramble -- Vegan MOFO #4

I am going to be completely honest here. I never, ever liked tofu. Until today.
How did I make it through the last few months of veganism without making a tofu scramble? No one ever told me that they are astounding. See, here's the thing: I used to love scrambled eggs, but I got sick whenever I ate them. Maybe I was allergic. Whatever. The point is, this tofu tasted just like my old scrambled eggs without the cruelty, cholesterol or the upset tummy. Okay, and since I'm being honest, I bought the wondrous Tofu XPress in August, and due to my tofu fear, hadn't used it until today. It worked amazingly well!

I bought the Indian black salt (Kala Namak) that all the vegans seem to rave about when making eggy-type things. Totally worth the $2.00 I paid for the ounce of black salt (fine ground) at the farmer's market from my spice guy. He really thought I was crazy for buying it...even made me smell it. Yup, smells sulphurous like cooked eggs. I told him that I was buying it to flavor my tofu and he was skeptical, to say the least. So, I'll be heading back on Saturday to let him know what a tremendous success it turned out to be. I served mine up with some toast slathered in Earth Balance spread, but I would think the scramble would be good with any breakfast-y type food.
I apologize for the crummy scramble photo. I just couldn't seem to get the right light, regardless of how many lights I turned on. Now, on to the recipe!!
Ingredients:
- 1 lb tofu, pressed and drained
- 1 heaping cup red onion, diced
- 1/3 cup bell pepper, diced
- 4 white mushrooms, sliced
- 2 TB olive oil
- 3 cloves garlic, minced
- 1 tsp turmeric (for color)
- 1/2 tsp onion powder
- 1 tsp garlic salt
- 1/2 to 3/4 tsp black salt (I started with 1/2 tsp, but added a bit more because it wasn't egg-y enough yet)
- 2 TB water
- 1/2 tsp cracked black pepper
- 2 heaping TB nutritional yeast
- Mix the spices in a tiny bowl. Stir in the water and set aside.
- Heat oil in a large nonstick skillet over medium heat.
- While the oil is heating up, crumble the tofu into bite-sized pieces.
- Saute your onions and bell pepper about 4-5 minutes. Then add the garlic and cook another minute.
- Add the tofu to the skillet and stir well. Cook about 3-4 minutes, then add in the mushrooms.
- Next add the spices (in the water). Pour over the tofu and stir well. I added my nutritional yeast here, too. Cook about 5-7 minutes more, stirring occasionally. If there is liquid in the bottom of the pan, raise heat slightly and let it evaporate. Adjust your spices and serve nice and hot. Maybe next time I'll add a bit of sriracha :)

03 November 2010
Cornbread Biscuits - Vegan MOFO #3
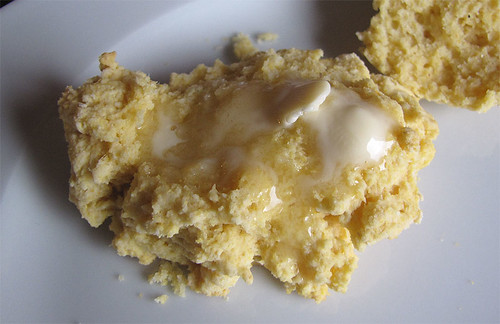
It is quite chilly here today, so I was craving something warm and snuggly. Well, not snuggly, per se, but like a warm hug for my hungry belly. I spent about 2 hours flipping endlessly through my vegan cookbook collection trying to find the perfect thing to make. Then, I stumbled upon Isa Chandra Moskowitz's recipe for Cornbread Biscuits and I couldn't say no. I needed them. A Huge THANK YOU to Isa Chandra because these babies are stellar. The recipe, can be found in her cookbook, Vegan Brunch.
The recipe makes a lot more than I thought it would. I made ours into 12 huge drop-style biscuits (think Bisquick drop biscuits). They're very filling, soft and moist inside with a slightly crisp outside. YUM! Perfect with a hint of sweetness, without being sugary. I am a raving loon for these biscuits, so I will shut up and share the perfect recipe now....
Ms. Moskowitz's Recipe: (Makes 12 huge biscuits or a ton of smaller ones)
Ingredients:
- 2 cups unbleached all-purpose flour
- 1 cup yellow cornmeal
- 1/4 cup sugar
- 2 TB baking powder
- 1/2 tsp salt
- 1/3 cup canola oil
- 1 cup almond milk (or milk of your choice)
- 2 tsp apple cider vinegar
- Preheat oven to 400 degrees F.
- Combine all dry ingredients in a large mixing bowl and stir well.
- Gently mix in the wet ingredients until just combined with few/no dry spots. The dough will be pretty thick and heavy.
- Using a large spoon to scoop out the dough onto a baking sheet. Like I said before, mine were huge, but make them whatever size you want. Because of the size of mine, they cooked for about 18 minutes. Smaller biscuits will bake much more quickly, about 12-14 minutes. These biscuits don't really brown when they cook, so just feel the tops -- when they're firm, your biscuits are done. Slather with some Earth Balance and tuck in. Oh, they also go well with anything spicy, like chili.
02 November 2010
Caesar Salad and Sweet Tater Fries - Vegan MOFO #2


Vegan MOFO Day 2!
I'm a thrifty sort of gal. I don't really do actual meal-planning, but I do try my damnedest to use up my food before anything goes south. That is precisely what motivated me to make this dinner tonight. I had 2 small heads of Romaine lettuce that were starting to go soft, along with 2 large sweet potatoes I bought a couple of weeks ago and a few Gardein Crispy Tenders rolling around in my freezer.
One dressing that I've missed so badly since going vegan was Caesar dressing. So, today when I was skimming through Alicia Simpson's cookbook, Quick and Easy Vegan Comfort Food, I came across her Caesar dressing recipe and squealed with delight! Literally, I squealed. I couldn't contain my overwhelming joy. I knew immediately that I had to make it. And, it was a delicious addition to my day :) It turned out fabulously and will have a permanent place in my salad repertoire!
Tonight's Dinner:
Baked Gardein Crispy Tenders with a sprinkle of garlic salt.
Baked sweet potato fries with a garlic mayo (Vegenaise, of course)
Caesar salad with homemade dressing
In case you don't have Quick and Easy Vegan Comfort Food (pg 98), here is the dressing recipe with my adjustments, so it is slightly different from Ms. Simpson's.
Ingredients:
- 3 1/2 TB fresh lemon juice
- 1 1/4 TB Dijon mustard
- 3 cloves garlic, chopped
- 3 TB nutritional yeast
- 1 TB capers
- 1/4 tsp vegan Worcestershire sauce
- 1/4 tsp sea salt
- 1/4 tsp fresh black pepper
- 1/2 cup Vegenaise (or your preferred vegan mayo)
- 1/4 cup extra virgin olive oil
- Place all ingredients in the blender except the oil. Blend until creamy.
- Put the blender on the lowest setting and slowly drizzle in the oil. Blend until well-combined. You could add some vegan parm cheese if the mood strikes. Instead, I added a bit extra nooch to my salad after I had served it.
Subscribe to:
Posts (Atom)