Showing posts with label tomatoes. Show all posts

29 August 2015

Curry Power


Curry? Um, yes. I really can't ever say no to some tasty-ass curry, and you shouldn't either. 

Don't know what to make for dinner? Have veg that's about to go soft? Tired of the same old shit food? Time to make a fucking curry. You can add almost anything to curry in terms of veggies and spices. This recipe turned out to be one of my favorites and all I did was throw some random stuff together. 

Makes enough for 2 large dinner portions with some tasty jasmine rice.

What you need:
-2 cups cooked chickpeas (1 drained can)
-3 tomatoes roughly chopped
-1 large carrot cut into small dice
-1/2 red onion, cut into small slices or diced
-2 cloves garlic, minced
-1.5 cups raw cashews
-1 cup frozen peas
-1 TB  coconut oil
-2 TB favorite curry power - I'm too lazy to concoct my own
-1/4 to 1/2 tsp sumac (optional but recommended)
-salt and pepper
-fresh coriander/cilantro
-cooked rice

What you do:
1. Cook rice and set side in to keep warm until plating.
2. Heat your oil over medium high heat until shimmering. Add the carrots and cook 3-4 minutes. Add onions, and cook until transparent, about 6 minutes. Now stir in the minced garlic. Once the garlic becomes fragrant, turn heat down to medium.
3. Add the tomatoes to the pan, along with the spices. I covered my pan for about 10 minutes as the tomato cooked down. Once the tomatoes get soft, remove the lid.
4. Add the cashews and peas, and cook another 5-7 minutes as some of the liquid cooks off and the curry tightens up a bit. Taste and adjust the seasonings as needed to fit your own twisted tastes.
5. Serve over the yummy rice and top with some fresh cilantro/coriander. 

06 January 2014

Crockpot Lentil Bolognese


Alright, so here's the deal, dudes: we got 17 inches of snow last night, so I had a work snow day today. Fuck yeah! What did I do? Cooked the shit outta some food. Waffles for breakfast. Leftover curried lentil soup for lunch. And this spectacular dish for dinner. It was an experiment for sure. I never even thought about making pasta sauce in a crockpot before. What the hell is wrong with me?

I've not made homemade pasta sauce in so long, and I thought I would give it a shot in my crockpot. I had to get creative with my ingredients since I (literally) can't leave the house. There are nearly 2 feet of snow in the street so there's no way in hell I can go to the store! Soooooo, I improvised with a few things, like using lentils instead of tvp, english muffins for garlic toast, and I had no mushrooms (insert sad face). I worried it wouldn't turn out, but WOW. This is some of the best sauce I've ever had. And the lentils are insanely filling. I rocked this shit out.

I have a 5 or 6 quart crockpot, and set it to HIGH for this sauce. It took me about 4 hours to get it cooked down to where I wanted it to be. Your crock may take longer or less time.
This easily makes enough for 4 large servings over pasta.

What I used:
  • 1- 28oz can crushed tomatoes 
  • 2 cups veg broth or water
  • 1-2 TBs Italian spice blend (mix of basil, parsley, oregano, and marjoram or something similar)
  • 1/2 cup matchstick carrots, minced
  • 1/2 diced bell pepper
  • 1 1/2 cups diced onion
  • 1 TB oil of your choice
  • 4 cloves garlic, mined
  • 1 cup dried lentils
  • lots of pepper
  • salt to taste
  • dash of red pepper flakes
  • 1 tsp garlic powder (gimme a break...I love garlic) 
  • 1/2 cup almond milk (takes out the metalic bitterness of the canned tomatoes)
What I did:
  1. Set the crock pot to HIGH. Add the tomatoes.
  2. In a skillet, heat the oil. Once hot, add the onions and carrots. After the onions turn translucent, add the garlic and cook another 4 minutes. Add the veg to the crockpot. 
  3. Add the broth, lentils, and spices and stir well. Cover with lid and cook for about 4 hours. Just be sure to stir it about once an hour. Just before the sauce reaches the 4 hour mark, I stirred in the almond milk and cooked about 15 minutes longer. It kills that metallic taste of canned tomatoes. Depending on how thick you like the sauce, you may need to add a bit more broth. I like it thick, so I didn't add any extra.  
ENJOY!

08 April 2013

Buffalo Chik'n Salad


I've never been a huge fan of salads, but I'm always up for a challenge, so I decided that I need to work on that. Enter: buffalo chik'n salad. In the words of a ridiculously-annoying-piece-of-shit-actor, "WINNING!" I have made this salad 3 times in the last week, so I think that says something.

I'm a recent fan of buffalo sauce, as I always thought I wouldn't like it. I tasted it once about a month ago, and I try to use it every chance I get. I use the bottled stuff, which appears to be much lower in calories than if I'd made it myself. The brand I got has 5 calories per tablespoon, so that's not bad at all. You can do the (chicken) chik'n a couple different ways, but I chose to brush the sauce onto the patty in between flippings. You can also cook the chik'n, and coat it in sauce at the end. I've done it both ways, but I like the first method better. It seems to allow the flavor of the sauce to cook into the chik'n better.

As for salad dressing, that's up to you. I prefer to blend a little vegan ranch with a tiny bit of avocado and drizzle it over the salad. It was awesome. But, you can do whatever your little heart desires.

Serves 2 as a main

What I used:
  • 2 Gardein Crispy Chik'n Filets
  • 3-4 TB bottled buffalo sauce
  • 1 tsp grapeseed oil
  • 2 cups baby spinach
  • 3-4 cups chopped romaine lettuce
  • 1 medium tomato, chopped
  • 1/4-1/3 cup red onion, diced
What I did:
  1. Heat a grill pan (or non-stick skillet) over medium-high heat. Add the oil. Once hot, add the chik'n filets. Cook about 3 minutes, then flip. Cook another 3 minutes, then carefully brush some buffalo sauce on the tops. 
  2. Turn heat down a bit to medium. Use tongs to very carefully flip your chik'n filets over. They will sizzle and pop. It's supposed to. Now, brush the top with sauce. After about 2 minutes, flip the filets again. I end up flipping the filets a couple times, brushing sauce on each time.
  3. Carefully transfer the chik'n to a cutting board and slice into strips.
  4. Get 2 plates and toss together the lettuce and spinach equally on each plate. Top it with the onions and tomatoes and then add the chik'n strips on top. Dress however you want.

30 March 2013

Quinoa Avocado Toast


I've been on this big quinoa kick lately. I've discovered that I really love it, and not just "like" it. This is kind of a big deal. Like many people, I've been trying to move toward a healthier plant-based diet, as opposed to the way I had been eating. I have always been a sucker for the vegan convenience foods, and I'm trying to cut down on my processed food and increase my whole foods. And quinoa is really helping me get away from pasta and rice because it's packed with protein and fiber, along with some important nutrients. So, yeah, I'm digging it. It keeps me nice and full, which is great for me and keeps me from snacking on junk between meals. This breakfast has become my new favorite lately.

My pudgy little tootsies need a new pedicure.

I also just decided to give sprouted grain bread a chance. I've always been a fan of wheat and multi-grain breads, but this bread rocks! It's dense, but not too dense. It's a bit chewy and has a slightly nutty flavor that goes exceptionally well with the quinoa, which also has a nutty flavor. Back when I could eat nuts (and not break out in hives), I would toast up almonds and add them to quinoa for a bit of crunch. It was fantastic and I highly recommend it. But, now I'm a jealous bitch because you can eat nuts and I can't. Wow, that sounds naughty, but I didn't mean it that way. Get your head outta the gutter, foo!

Okay, so, here's how I made this delicious breakfast of awesomeness:
Serves 2.

What I used:
  • 2 slices sprouted grain bread
  • 1/3 cup uncooked quinoa
  • 3/4 cup water
  • 4 slices tomato
  • 2/3 medium-size avocado, mashed
  • Herbamare seasoning
What I did:
  1. Bring water to a boil in a small pot with lid. Once it's bubbling, stir in the quinoa. Cover pot with lid and bring to a boil. Once boiling, turn heat down to medium or medium low and let simmer 15 minutes. Fluff with fork.
  2. In a bowl, mix mashed avocado with quinoa and season with a little Herbamare. 
  3. Toast the bread. 
  4. Slather the quinoa/avocado on the toast and then top with tomatoes. 
  5. CHOW DOWN
This breakfast came at the suggestion of my very dear pal, Nicole of Nicole Eats. She's a tremendous inspiration in my cooking. Love ya, lady!

14 December 2012

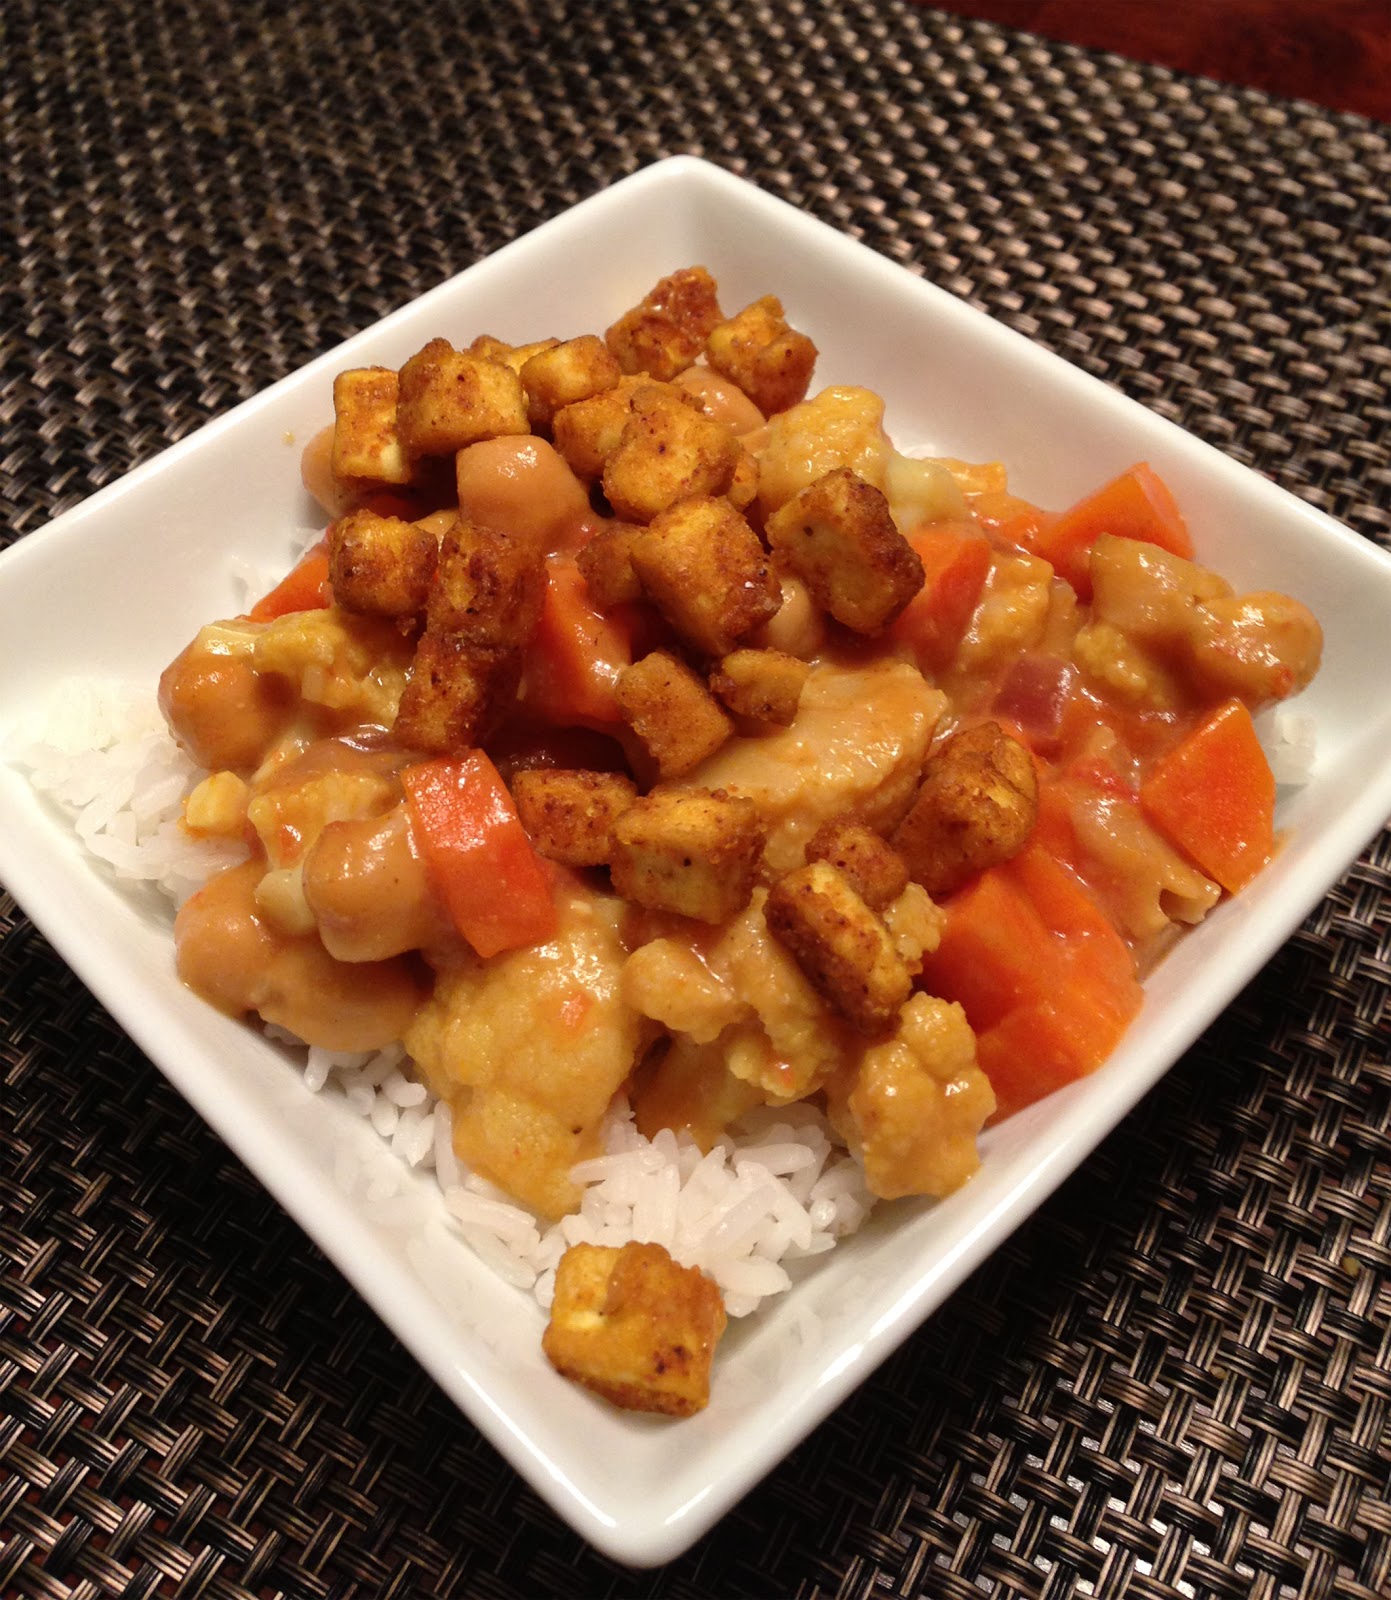
Creamy Curry with Tofu


If you read my last post, you know that my pal, Nicole (of Nicole Eats) is completely kickass and my recent cooking inspiration. She has been on a mission lately to help me find a recipe for tofu that will make me actually LIKE tofu. Okay, okay, I am a sucker for a really good scramble. But, I mean tofu as a dish. So, while we were chatting last night I saw a recipe for curried tofu somewhere. It stuck in my brain, so I decided that I needed to make some tofu today...and make it curried. This is not the recipe I found online...or anywhere. This came from my head, and I'm pretty stoked about that. So, I (of course) texted Nicole today to ask if it would work or be any good. I got her approval, and heated up my cast iron skillet.

Making tofu is all fine and good, but what else was this chickpea to make for dinner? Well, I do have a killer rice cooker, so I started some rice. What else? Well, I dug around in the pantry and fridge and scrounged up some awesome. I made a mellow, creamy curry to go with the tofu (which was fucking awesome, by the way), and chowed down.

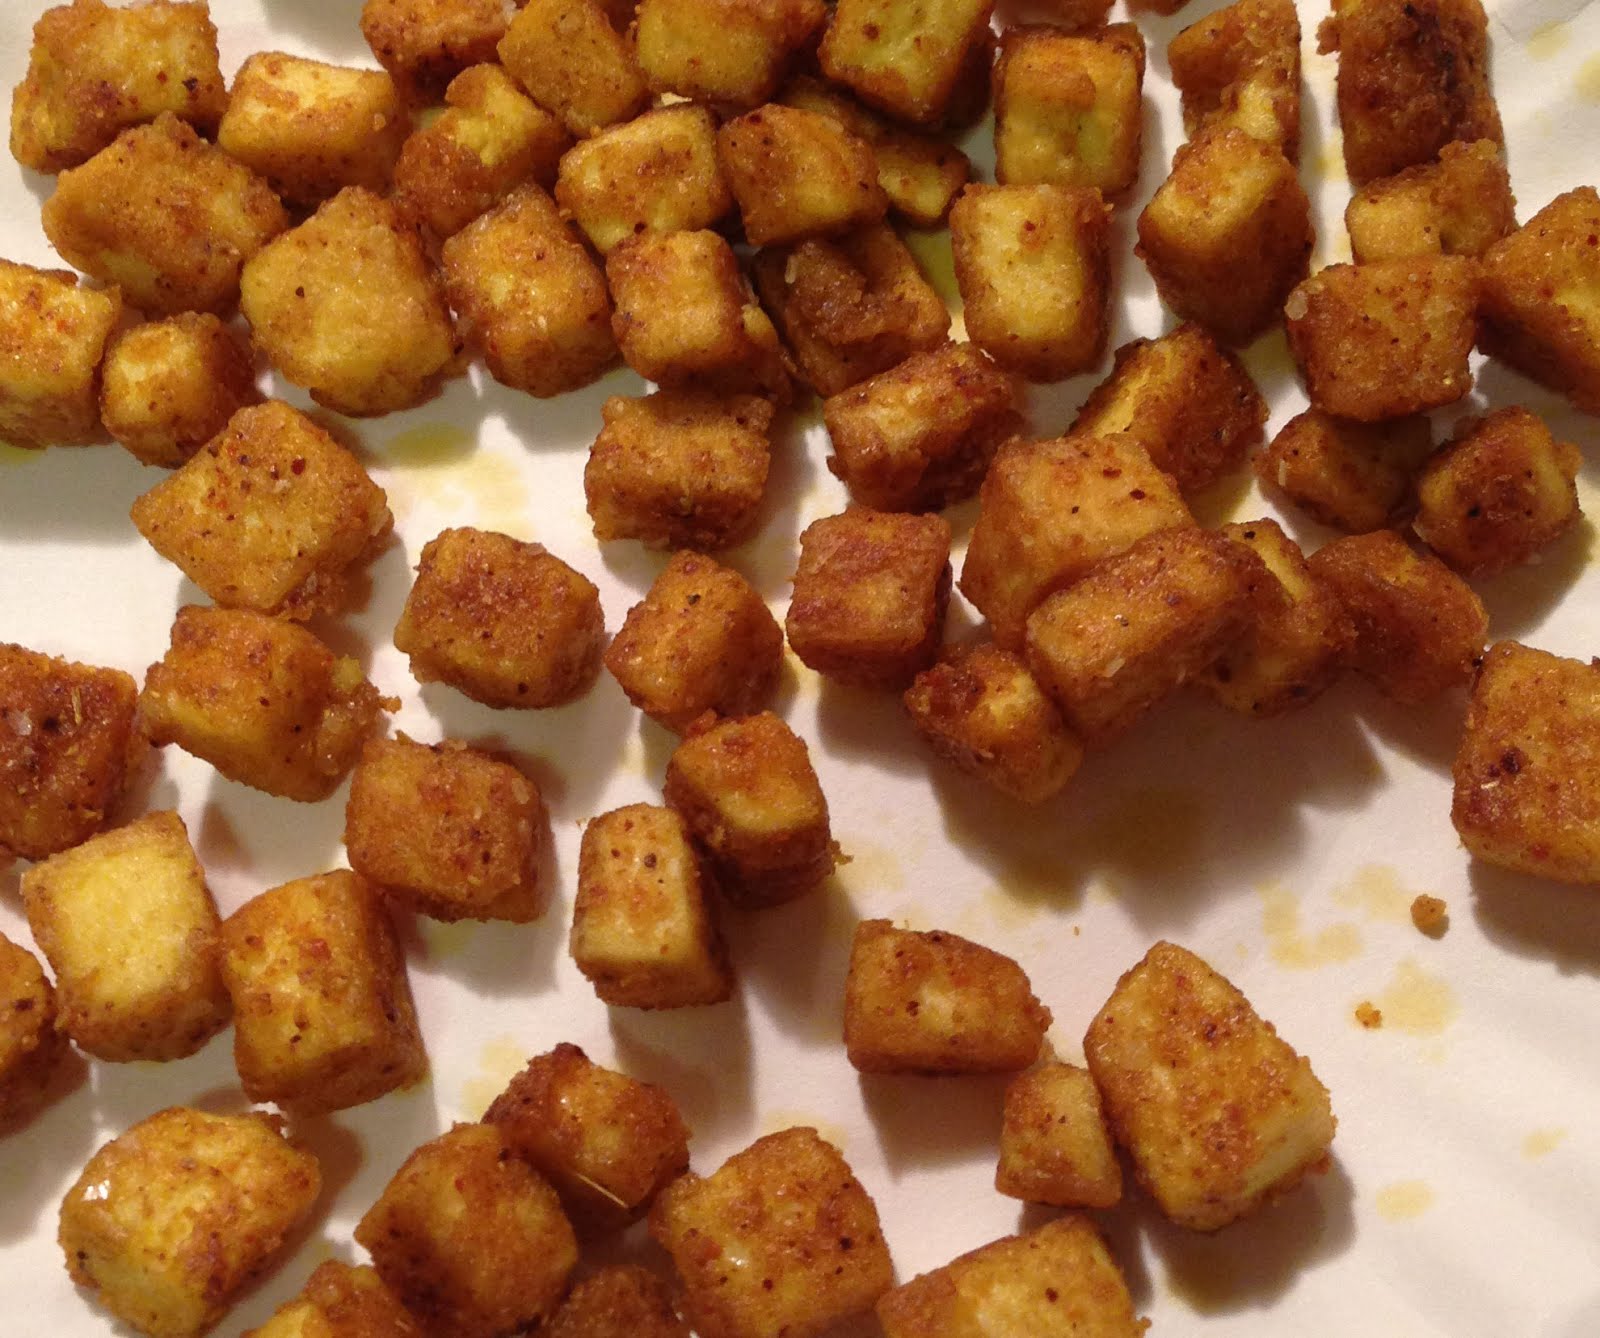
For the tofu: 
  • 1/4 block of pressed tofu, cut into small cubes (or whatever size gets your motor going)
  • 1 TB cornstarch
  • 1 TB of your favorite curry powder (I've been gifted some Shan brand and it is AWESOME)
  • pinch salt
  • 1TB oil for pan-frying
  1.  Heat the oil in a skillet until shimmering. I had mine over a medium-high heat.
  2. Throw the cornstarch, curry powder, and salt into a bowl and mix well with a fork. 
  3. Toss in the tofu and shake it around until all the sides of the tofu are covered in starch and spice.
  4. Now, carefully pour the tofu into the skillet and make into a single layer if possible. Stir every few minutes, until the sides are a bit crispy and cooked to your liking. 
For the Curry:
  • 1/2 cup vegetable broth
  • 1 1/2 cups cauliflower florets
  • 1 large carrot, peeled and cut into small dice
  • 1 small tomato, diced
  • 1/4 of a large red onion, diced
  • 2 cloves garlic, tiny dice
  • 1TB or more of your fave curry powder
  • 1/2 can chickpeas
  • 1/2 can of LITE coconut milk
  • 1 tsp coriander powder
  • 1 TB cornstarch mixed with 1/4 cup water until the starch is dissolved
  1. In a skillet with a lid, heat the broth with the curry powder and coriander mixed in. I turned my burner to Med-High for this. 
  2. Once it's hot, add in the cauliflower, carrot, onion, tomato and garlic. Cook, covered, stirring every few minutes, until the veg is a bit crisp. I think mine took 8 minutes. 
  3. Add in the chickpeas, coconut milk, and cornstarch slurry. Keep the lid off, and stir often so the coconut milk doesn't burn to the skillet. Cook until the sauce has thickened to your preference. Mine took about 6 minutes.
Almost there. Just another minute or 2.
So, there you have it. I officially like ONE tofu. And, I am getting back into my kitchen. Thank you, Nicole! You're my foodie BFF. xoxo meg

08 August 2012

Spaghetti and Balls


I've been so busy lately that the blog has been neglected. I do apologize for that. Things are calming down again and I should be able to start cooking more. As an act of good faith, I have decided to share my latest attempt at pasta sauce with you. It is quite yummy. And garlicky. And goes perfectly with The Sexy Vegan's Balls (pictured above). The balls are nutty and moist....all the things a ball should be. Haha. But, really, they are quite delicious. The recipe is not mine to share and can be found in his cookbook.

I had an abundance of tomatoes that were on the verge of going to veggie heaven, so I decided to attempt another marinara sauce. I never remember what all I put in it the last time I made it, so it always turns out differently. This one turned out even more different because my sweet basil died and the only fresh basil I had was Thai basil (it has a slight licorice flavor). It turned out much better than I had anticipated. In fact, we scarfed all the sauce up in one fell swoop. No leftovers made for a sad chickpea the next day.

Serves 2-3 people

  • 6-ish tomatoes (I had 3 large romas, 1 regular, and 2 medium-size orange ones)
  • 6 cloves garlic, minced
  • 2-3 TB olive oil (I started with 2 and kept adding it as needed)
  • 1/2 cup onion, diced
  • a palmful of fresh basil leaves, maybe about 1/4 cup, then minced
  •  2 TB fresh parsley, minced
  • Parmela vegan parmesan substitute, at least a couple TB
  •  1/4-1/2 tsp dried oregano, depending on your tastes. I used 1/4 as I don't particularly love it.
  • salt and pepper
  • 1 TB sugar
  • 1/4 cup almond milk (sounds weird, but helped in combatting the acidity of the tomatoes)
  1. Preheat oven to 400 degrees F. Add the tomatoes to an oven-safe dish and lightly coat with a little olive oil. Sprinkle with a little salt and pepper and roast for about an hour. Once they are soft and getting some browned spots, go ahead and remove from the oven. Let them cool down a bit before handling them. 
  2. In a skillet, heat 1-2 TB olive oil over medium heat. Once it is hot, add the onion and cook until softened. Then add in the garlic and cook until it becomes fragrant and is soft. Turn down the heat to low. 
  3. Take your tomatoes, a smidge of olive oil, the fresh herbs, sugar and milk and blend it up in your food processor until it is to your liking in terms of chunkiness. Now add this to the skillet and let cook together for at least 10 minutes. I added in the vegan parm and let it cook another 4-5 minutes. Adjust your seasonings and you're done.

23 January 2012

Spicy Polenta Cakes


Casually browsing my cupboard last night, I stumbled on a bag of polenta that I had forgotten about. I've never cooked, let alone eaten polenta before, but I do love corn. How can anyone not, really? Well, I remembered seeing a few recipes over the last couple years for something called polenta cakes, so I decided to make my own vegan version featuring some Daiya Pepperjack. It was a total experiment...I was skeptical that they would work. But, they did....at least, they did with some toppings. I made some homemade black bean and corn salsa and then cooked up some yummy spicy tvp. They were both mega awesome on the pan-fried polenta cakes. Even better? Putting both toppings on one cake, like this:


The polenta cakes take a little prep time, first cooking the polenta and cheese and then refrigerating for about an hour to firm up, then finally pan-frying the tasty cakes. I suppose you might be able to bake them, but I wanted them cooked up quick and crispy. I used a circle cookie cutter to cut them out, but you could use a glass or cut them in squares with a knife.  

This recipe makes about 12 three-inch circle cakes.

Making the cakes:
  • 1 cup dry quick-cooking polenta (if it doesn't say quick, you're in for a long time of whisking)
  • 1 1/2 cups veg broth
  • 1 1/2 cups water (or you could use more broth)
  • heaped 1/2 cup or a bit more Daiya Pepperjack
  • 2 TB nooch
  • salt and pepper to your liking
  • 1/2 tsp smoked paprika
  • 1/2 tsp chili powder
  • 1/2 tsp garlic powder
  • hot sauce (optional)
  1. Heat broth and water in a large pot over high heat until almost boiling. Add paprika, chili powder, a few dashes of hot sauce, and the garlic powder. Then, turn the heat to medium low and whisk in the polenta. 
  2. KEEP WHISKING until the polenta is very thick and creamy. You don't want any lumps. It will take about 5 minutes of nonstop whisking if you use the quick cook. I've read that the regular stuff can take up to 20 minutes of whisking. 
  3. Now, whisk in the cheese and nooch. Keep on stirring, kiddos, until the cheese is melted. Turn off the heat and remove from the burner. 
  4. Quickly line a 9x13 inch sheet pan (or a baking dish) with some plastic wrap and give it a spritz of cooking spray. Now, smear the polenta onto the baking plastic. Try to make it into an even layer, like so.
  5. Spritz the top with a little more spray, then cover the polenta with more plastic wrap and refrigerate for 40-60 minutes.The polenta will be quite firm. 
  6. Cut the polenta. Now, heat a non-stick skillet over medium high heat. Add some oil (enough to cover the bottom of the pan), and ease a few cakes into the pan. Cook about 3-4 minutes, then very gently flip the cakes. Cook another few minutes, until each side is golden and a bit crisp. Sorry, I was busy...no pictures. Remove the cooked cakes and put them on a plate while you cook up the rest. 
  7. Top those bugger with some yummies. We used the spicy tvp and homemade salsa, but you could use bean and veggie chili, more cheese, whatever. Make it yours!
Here's my super simple salsa recipe:
  • 1 can black beans, drained and rinsed
  • 1 can corn, drained and rinsed (I prefer fresh, but it is winter here and no corn can be found)
  • 1 tsp cumin
  • 1/2 cup diced red onion
  • 1/3 tsp chili powder
  • 1/3 cup diced bell pepper
  • salt
  • juice of half a lime
  • 1 cup diced tomato (today was a mix of cherry tomato and roma)
  1. Mix everything together and let rest for about 10 minutes.
Spicy TVP recipe:
  • 1 cup dry tvp
  • about 1 1/4 cups veg broth (I didn't measure, but this seems about right)
  • 1/3 cup diced onion
  • 1/2 tsp smoked paprika
  • 1/2 tsp garlic powder
  • 1/2 tsp cumin
  • 1 TB taco seasoning powder
  • salt and pepper
  • 1/2 cup hot salsa
  • hot sauce
  • scant 1/4 tsp liquid smoke (optional, but recommended)
  1. Mix tvp, dry spices, onion and broth in a small pot over medium heat. Stir occasionally, until the liquid is absorbed.
  2. Once the liquid is almost entirely absorbed, add the salsa, hot sauce and liquid smoke. Turn heat to low and let everything simmer together for at least 5 minutes, but probably a little longer to let the flavors merge. Done!

    14 November 2011

    Hearty Minestrone Soup


    After being on the road and traveling for the last week, I missed cooking. Not only that, I missed eating REAL food. You know, whole foods, not processed garbage. Well, today was the perfect day for cooking- it was cold, windy and rainy...prime soup-making weather. So, that's what I did. And it was super yummy. Why minestrone? Two reasons: first, it is my favorite soup. Second, I had to make up for a terrible soup I ate on vacation.

    You see, after my best friend's beach wedding, we went out to eat at a nearby restaurant. I ordered minestrone soup and some salad. The soup was a terrible let-down. It lacked pasta, beans and flavor. What it did have was cabbage and a few pieces of carrot. Boring. And not at all what I'd ever call a minestrone soup. So, I have been obsessing about minestrone ever since. I needed to make my own and erase that terrible experience from my brain. Sure, I've made minestrone before, but this is my new favorite recipe. Here's my other minestrone recipe if you're interested.

    This soup is soooo filling! I absolutely love it. It's hearty and flavorful and overall awesome. It makes enough for about 6-8 bowls, depending on your appetite.

    What you need:
    • 3 medium to large carrots, cut into 1/4 inch slices
    • 2 large stalks of celery, sliced (I slice mine thinnish)
    • 1 small yellow squash, sliced
    • 1 medium red onion, diced
    • 4 cloves garlic, finely diced
    • 4 cups vegetable stock (I used Imagine brand)
    • 15-oz can fire-roasted tomatoes
    • 8-oz can tomato sauce
    • 16-oz can chickpeas, drained
    • 16-oz can light red kidney beans, drained
    • 2 cups water
    • 2 1/2 TB olive oil
    • 1/3 tsp celery seed
    • 1/4 tsp celery salt
    • 1 1/2 TB dried parsley
    • 1/3 tsp dried rosemary
    • 1/2 tsp rubbed sage
    • 1/2 tsp garlic powder
    • 3/4 tsp onion powder
    • 1/2 tsp oregano
    • 1/4 tsp tarragon
    • 1 TB dried basil
    • 1/4 tsp red pepper flakes (optional, but recommended)
    • 2 cups small dry pasta of your choice
    • 2-3 cups fresh baby spinach, stems removed
    • salt and pepper to your tastes (minestrone isn't minestrone without lots of pepper)
    What you do:
    1. Heat oil over medium heat in a large pot that has a lid. Mine is an enameled cast iron dutch oven. Once hot, add the carrot, celery, and onion. Add your spices, minus the salt and pepper. Saute for about 4-5 minutes. Then add the garlic and squash. Cook another 4-5 minutes.
    2. Add the broth and water and scrape the bottom of the pot to make sure nothing has become stuck. Stir in the chickpeas, beans, tomatoes and tomato sauce. Salt and pepper the soup. Cover with lid and reduce heat to medium-low. Let simmer about 20 minutes. 
    3. Stir in the dry pasta and baby spinach. Cover with lid and cook another 20 minutes. By now, the liquid will have reduced somewhat and the pasta will be cooked through. Check for seasoning and serve up with some crusty french bread. Enjoy!!

    22 October 2011

    The 3 C Curry - Vegan MoFo #17

    It's nearly impossible to get a good photo of curry. This will have to suffice.
    What is a 3 C curry you ask? Cauliflower, Coconut & Chickpea curry. And, it's one of the best curries I've ever had. Serve it over some rice and you've got an awesomely heatlhy and tasty dinner.

    This morning, at my farmer's market, I got a MASSIVE head of cauliflower for $2.00! I had to have it. Then, after my impulse purchase, I had to figure out what to do with it. Some people buy handbags or candy on impulse, I buy veggies. Don't judge me! Well, I hadn't made curry in quite a while, so I decided that that's what I needed. I got the basis for this here, but I definitely changed it up quite a bit. I served mine over brown rice, and it made enough for 4 meals, no problem.  Enough chatter, on to the recipe!

    What you need:
    • 1/2 head large cauliflower cut into florets
    • 1 cup diced carrot
    • 1 can chickpeas, drained
    • 1 can rotel or other diced tomatoes with chilis (I drained mine a bit)
    • 1 cup almond milk
    • 1 small red onion diced (or half a large one)
    • 1 1/2 TB curry powder- Mine's exceptionally strong muchi curry powder, so you may need more.
    • 1 tsp coriander powder
    • salt and pepper
    • 3-4 TB unsweetened coconut flakes
    • 2 dashes ginger
    • 2 small jalapenos, seeded and minced (completely optional)
    • 1 1/2 TB coconut oil
    What you do:
    1. Heat coconut oil in a large skillet (with a lid) over medium heat. Once hot, add the onions and carrots and cook, stirring occasionally, until the onions are somewhat translucent. Then add the curry powder and stir. 
    2. Now add the cauliflower, chickpeas, coconut flakes, jalapeno, rotel, and almond milk and stir well. Bring to a boil, then turn heat to medium-low and cover with lid. This will help the cauliflower and the carrots steam and soften. Just stir it once or twice to make sure it isn't all sticking to the bottom of the pan. I think I cooked mine like this about 15 minutes, until the cauli and carrots were softened to my liking.
    3. Then remove the lid and let the liquid cook down some. Maybe 5 minutes or so. Then, you're done. Easy. This is why I love curries. The hardest part is waiting for it to get done.
    A year ago today, I shared my version of Chickpea Tu-Not Sandwiches! Mmmm. You should try them :)


    06 September 2011

    The Best Salad I've Ever Had


    I'm completely and totally obsessed with salads lately. Probably, I should be institutionalized. Today's lunch makes 6 salads in 3.5 days. I don't know what my deal is. I guess I neeeeeeeed raw veggies in my bellah. On the rainbow eating kick, I made this incredible salad. It has a little bit of everything. It's in a huge bowl and I ate it all myself with just a little bit of Italian dressing. I'm in love with adding so many flavors to my salads now.  Here's an overview so you can see it all:


    Dudes and dudettes, I introduce to you the best salad I've ever had: The Rainbow Salad. Dig it. 
     
    Red- handful of cherry tomatoes from my garden
    Orange- 1 small carrot, thinly sliced
    Yellow- 1/2 an ear of fresh (uncooked) corn cut from the cob
    Green- 1 heart of romaine, 1/4 cup chopped cuke
    Blue- handful of blueberries
    Violet/Purple- handful of purple grapes, 2-3 TB diced purple onion
    Brown- handful raw walnuts
    Black- 1/4 cup black beans
    Dressing- Don't worry, I'm not one of those folks who jabber on about how good salad is without dressing because it's not. Those people frighten me. My weapon dressing of choice is zesty Italian. Use a little...or a lot. Whatever. It's your salad. I only ask that if you make a shitty salad, don't tell me about it because I don't care. Now, if you make a killer salad to end all other salads, please share. Maybe instead of a dance-off, we can have a right proper salad-off and people can vote over who makes the better salad. But, I digress.

    On days when I eat at least 5 colors, I seem to feel better. I feel lighter and have more energy. I'm going to keep going with it, and we'll see where I end up.Maybe there really is something to this whole "eat your colors" thing. I'm still a little skeptical, but I am keeping an open mind. I'm trying new combos of produce and I really am loving it. That's not even snarky.

    03 September 2011

    Farmer's Markets and Rainbows

    I decided today, as I do at least once a week (usually twice a week), that I needed to hit up the farmer's market and get some goodies. I spent $11.00 on all of this:


    The best part of all is that I got 2 new items I've never had before. First are the little yellow tomatoes. I remember seeing them at the grocery store and one of my friends grew some last year, but I never tried them. Second are the apples. Alright, I've had apples before (duh), but I've never heard of the Molly Apple. So, I snagged them. Look at this beauty!


    It seems every single year at my FM, I see more and more varieties of produce I've never heard of, which is completely awesome! So many new urban farmers are showing up, along with old timers sharing their heirlooms. I totally dig it. Since becoming a veg head, I have tried more new foods than I ever did as an omni. And, it seems that is pretty common among us herbivores. I know in my own case, I became so much more adventurous with food once I knew I wasn't going to stumble on weird bits of meat and nasty eggs, which have made me ill for most of my life. Now I seem to jump into new foods head first, and I don't think that's necessarily a bad thing.


    I do try hard to "eat my colors," adding numerous colored foods to each day, and sometimes each meal. A lot of new vegetarians and vegans stick to what they know they like, and I was like that at first. But, the more I read about keeping healthy, the more I started to mix it up. Think of all the veggies and fruits in a market. They are (literally) a rainbow. I know you can't always do it every day, but try to consume a rainbow of fresh produce. Physicians say that it's one of the best ways to be sure that we are getting a full spectrum of vitamins we need to function well. You all know Roy G Biv, right? It's the colors of the rainbow in order of color.

    Here are some examples of what I eat a lot of:

    RED: Tomatoes, strawberries, red bell peppers, cherries, beets, pomegranate, watermelon, cranberries
    ORANGE: Oranges, orange bell peppers, carrots, peaches, butternut squash, sweet potatoes, mango,
                       pumpkin
    YELLOW: Pineapple, lemons, peaches, corn, yellow peppers, yellow onion
    GREEN: Spinach, broccoli, kiwi, bell pepper, avocados, cabbage, green onion, pears, brussels sprouts,
                    bean sprouts, cucumbers, zucchini, limes, peas, okra, lettuce (especially the darker lettuces)
    BLUE/INDIGO: Blueberries, black grapes, dark plums, blackberries
    VIOLET: Purple potatoes, purple cabbage, red/purple onions, plums, eggplant, grapes, raspberries 


    Here's what I got today:
    • 3 ears of fresh-picked sweet corn $1.00
    • 4 huge Molly Apples $2.00
    • 1 heaped pint blueberries $3.00
    • 2 lemons $1.00
    • 2 garlic heads $1.00
    • 1 heaped pint yellow tomatoes $1.00
    • 5 big peaches $2.00
     I guess my body was craving some yellows today. I notice when I have a strong craving for something in particular that it's something my body may be missing. I haven't eaten any yellows in close to a week, and look what I ended up buying today!? I really do think that you body will tell you what it needs, most of us need only learn to listen to its pleas. 


    What are your favorite colors to eat?

    17 June 2011

    Meg's Fave Marinara Sauce

    A few nights ago, I had a most tasty dinner...which you can spy above. The tempeh beanballs were an alteration of the recipe from Appetite for Reduction, which happens to be one of my top 3 favorite cookbooks ever. Totally not joking here. It's amazing.

    So anyway, I decided to make the balls (heehee), when I suddenly realized I didn't have a jar of sauce for my spaghetti. Aargh. Silly me. But, I am nothing if not resourceful. Okay, that's an exaggeration. I'm also sarcastic and goofy and junk like that. But, back to the topic at hand: marinara. I made it myself because I was in a total crunch, and I had zero options. Fine, fine, I could have gone to the store, but I refuse to go for only 1 thing. Blah blah blah. I should really just shush and move on to the recipe. Head's up, this is pretty garlicky, just how I like it.

    Ingredients:
    • 2- 14oz cans of diced or crushed tomatoes
    • 5 cloves garlic, minced
    • 1 tsp olive oil
    • 1/2 tsp garlic powder
    • 3/4 tsp onion powder
    • 1/4 tsp red pepper flakes
    • 1/4 tsp coriander (optional...I just LOVE coriander)
    • 1/4 to 1/2 tsp dried oregano (I use very little because I don't like it much)
    • dash dried thyme
    • 1/2 tsp dried parsley flakes
    • 1/2 tsp fresh black pepper
    • 1/2 tsp Braggs or soy sauce (optional)
    • about 12 basil leaves, shredded
    • salt to your tastes
    Method:
    1. Drain most of the liquid from the cans of tomatoes, then put the tomatoes in a large sauce pan over a medium heat. Add everything else and cook for about 20 minutes, or until the liquid cooks down by at least half. 
    2. If you aren't in favor of chunkier sauce, use an immersion blender to break it down. That's what I did. Though, I have read that you can put it in a blender (be ultra careful as hot things have a tendency to explode in blenders). 
    3. Taste and adjust seasonings. How ridiculously easy was that?

    14 May 2011

    Spicy Tofu Scramble

    I've been told I'm a rare breed of veg...I don't especially love tofu, in general. But, I'm making an attempt to try more ways of cooking and eating it. Thus, the spicy tofu scramble. I ate mine with some hot salsa and flour tortillas like a breakfast taco/burrito. They were incredibly tasty. I've only made tofu a couple of times, so I am always surprised when I have success with it. Lame, I know. I can't help it. I just have texture issues, but a very thorough pressing does help with that. I simply cannot enjoy juicy tofu. Blarg. Moving on....

    I love food with a kick, and that's what I was really craving today. I used a little bit of everything in this scramble as I had lots of odds and ends in my fridge that needed to be used up. Really, you could probably use any veggies you want. I don't have an exact recipe for this one. Fly by the seat of your pants, live a little. Be creative. Make it yours.

    This pseudo recipe make enough for 4 little tacos or 2 big burritos. I only say pseudo because I'm not certain of the measurements. I just kind of threw things together without much thought.

    Ingredients:
    • 1/2 block tofu, pressed, then crumbled with your fingers or a fork
    • 1/4 cup chopped red onion
    • 3 TB green pepper, diced
    • 4 cremini mushrooms, chopped
    • 1/2 roma tomato, chopped
    • 2 cloves garlic, minced
    • 1 tsp my taco seasoning (or your favorite brand)
    • 1/2 tsp coriander
    • 1/2 tsp chili powder
    • 1/4 tsp turmeric
    • 1/4 tsp garlic powder
    • 1/8 tsp red pepper flake
    • salt & pepper
    • 1 tsp olive oil
    Method:
    1. Heat a nonstick skillet over medium heat. Add the oil and heat for 2-3 minutes. Add in the onion, green pepper, garlic and tofu along with all of the spices. Stir well to coat the tofu in spices and oil. Cook about 5 minutes.
    2. Add the mushrooms and cook until they are softened, which took me about 4minutes. Don't forget to stir regularly though so that everything cooks evenly.
    3. When it is pretty much done, add in the chopped tomato and cook until heated through. Maybe 3-4 minutes. Any longer and it will pretty much disintegrate the tomatoes. Serve on tortillas and top with some warmed salsa. I just put mine in a tiny ramekin and heat in the microwave for about 15 seconds. Mmm mmm. So tasty and spicy.

    17 February 2011

    BBQ Tempeh & Homemade Baked Beans


    A couple weeks back, I decided to stock up on some plain tempeh from Trader Joe's, which I recently discovered I am in love with (the tempeh). I used up the smoked tempeh last week, which left me with 2 packages of the plain stuff. I've literally been trying to think of how I want to use it up for the last week. I am not old and senile, but I am indecisive. So, last night I started talking with some twitter pals about soaking some navy beans. I didn't know what to make with them, and several pals said to make baked beans. Ick.

    "But," they exclaimed, "they are a million times better when you make them from scratch! The canned baked beans are a sad representation of what real baked beans are all about."

    "Fine! I'll give it a shot, but I better not be wasting my fucking beans. Do you understand how hard it is to find good dried beans around here?" I complained. I'm clearly a 70-year old in a 30-year old's body. Get off my damn lawn!

    Well, I started wondering about what goes well with baked beans. And I remembered cookouts always seem to have baked beans with some sort of BBQ. And coleslaw. That is the fascinating story of how I ended up making not only BBQ sauce from scratch, but some baked beans and coleslaw. You will be quizzed. And it won't be multiple-choice, you whippersnappers.

    Today's recipe for BBQ sauce makes A LOT of sauce. I have no idea what to do with the rest of mine. The tempeh (depending on how you cut it) can make 3-4 sandwiches on normal-sized burger buns. The BBQ sauce recipe is adapted from this one. The baked beans made enough for 3-4 as a side dish. Who would eat baked beans as a main dish? Sheesh. The bean recipe is adapted somewhat from Veganomicon, but I did change several things, such as using soaked, cooked navy beans instead of canned, and changing up the spices somewhat. If you do decide to make both recipes at the same time, I suggest starting the BBQ sauce once you get the beans in the oven. This will get them both done at the same-ish time. See? I'm helpful. Sometimes.

    You can figure out your own coleslaw for now because mine wasn't perfect, but it made the cut for this dinner. I REALLY liked adding the creamy coleslaw onto the tempeh sandy, like a condiment. Clever, no? Yes, it is! This is my blog. I can say what I want!


    Ingredients for BBQ sauce:
    • 1- 8oz package of plain tempeh, cut into finger-sized pieces or whatever size you prefer
    • 1- 15oz can of tomato sauce (or use 2 of the small cans)
    • 1 small-medium yellow onion, diced small
    • 1 TB olive oil
    • 1/2 heaped tsp red pepper flakes
    • 1 tsp cumin
    • 1/2 tsp cayenne pepper
    • 4-5 cloves garlic, minced
    • 1/2 cup ketchup
    • 1/2 cup plus 2 TB brown sugar
    • just under 1/2 cup molasses (not blackstrap)
    • 2 TB spicy brown mustard
    • 3 TB regular yellow mustard
    • 1/2 tsp or so of black pepper
    • 1/2 tsp coriander
    • 1/2 tsp garlic powder just because
    • 1 1/2 TB Braggs liquid aminos (or soy sauce)
    • 1/2 tsp liquid smoke
    • A pinch of kosher or sea salt to your tastes
    Method for the BBQ sauce and Tempeh cooking:
    1. Heat a large sauce pan or deep skillet over a medium heat. Add the oil, cumin and red pepper flakes. Let the oil heat through...maybe 3-5 minutes. Add in the onions and let cook about 6-8 minutes. You want them transparent and soft. I even let mine caramelize a tiny bit. 
    2. While the onions were cooking, I got a bowl and whisked together the rest of the ingredients (except the minced garlic). Always be prepared or something. 
    3. Okay, onions are cooked. Add the garlic and cook 2 minutes. It'll be nice and fragrant. 
    4. Add the bowl of ingredients I made you prepare. Haha. You're welcome. Stir well and scrape any bits from the bottom of the pan. I just used a whisk because it was easiest and I didn't want to get another utensil. 
    5. Let cook over medium heat, stirring occasionally for about 30 minutes, so it thickens a bit. I do suggest that once it starts bubbling, you turn the heat down to just under medium heat. Otherwise the bubbling could make a mess. I got sauce in my hair, if that is any indication. And, while I'm quite short, that sauce got some serious air. So, you've made sauce. Congrats.
    6. Preheat your oven to 375 degrees F (I should have maybe told you that already). Lightly oil a baking dish of some sort. I used an enameled stoneware baking dish. Pour about half of the BBQ sauce into the dish. Then drop your tempeh fingers in. I used my fingers to flip the tempeh around in the sauce to cover all sides in said sauce. But, if you are a germophobe or whatever, you may use tongs. I also used a spoon to scoop lots of sauce onto the tops of the tempeh. Cover dish with foil. Bake about 30 minutes. Or until the fingers are somewhat tender and have absorbed a bit of the BBQ sauce.
    7. When I put the tempeh slices on my bun, I slathered on a bit more of the leftover sauce that had cooked in the dish. Holy yum. Then, topped it with some coleslaw and a bit of yellow mustard. It was ridiculously messy, but SO worth it. 
    Now, on to the beans. I assume you have already soaked them overnight. Mine tend to soak close to 18 hours before I cook them. Then, put them in the pot with fresh water and about a TB of salt. Stir it all up. Put the lid on, askew, to let the steam out. Cook the navy beans for about an hour over medium heat. But, test for doneness. yours may take longer or less. I dunno! SO, your beans are cooked. Lets get started with the rest of the recipe.


    Ingredients for the baked beans:
    • 1 1/2 cups cooked and drained navy beans (or 1 can, drained and rinsed)
    • 1 small white onion, minced
    • 3 cloves garlic, minced
    • 1 - 8oz can of tomato sauce
    • 1/4 cup molasses (not blackstrap)
    • 1 1/2 tsp mustard powder
    • 1/2 tsp coriander
    • 1/4 tsp salt
    • 1/8 tsp allspice
    • 1/8 tsp red pepper flakes
    • dash cayenne
    • 1/2 tsp garlic powder
    • 1 bay leaf (don't forget to remove it before serving the beans!)
    • 1 tsp Braggs (because I'm a junky for the stuff)
    • some black pepper to your tastes
    Method for the baked beans:
    1. Find yourself an oven-proof pot with lid. I used a small enameled cast-iron dutch oven. Heat the pot over a medium burner and add the oil and red pepper flakes. Then add the onion and cook until the onions are translucent. 5-7 minutes. Now add the garlic. Cook another couple of minutes until some of the onions are just starting to turn golden. 
    2. While the onions are cooking, add all the other ingredients (except the beans) to a small bowl and whisk to combine. 
    3. Once the onions are browned a smidge, add the sauce you just mixed up. Stir well and dislodge any bits from the bottom of the pan. Cook about 5 minutes this way. Then turn the burner off.
    4. Add the beans and mix well. Pop the lid on the pot and cook on the center rack of oven 60 minutes total. BUT, halfway through, pull them out and give them a good stir. Take a moment to taste them and adjust your spices. Then put the cover back on and cook another 30 minutes. Fish out the bay leaf and toss it in the trash. Done!

    27 January 2011

    Chickpea Ballz!


    Chickpeas. Ballz. Pasta. You literally cannot go wrong. Or, I should say, I couldn't go wrong since I'm the lovely lady who made it all. Okay, okay, I didn't make the pasta from scratch, but I did make the marinara. Yes, I was a marinara virgin. And, get this, I didn't use any recipe. I'm full of awesomeness!

    I got the idea for the chickpea balls from Veganomicon, which has a recipe for beanballs and spaghetti (pg189) using kidney beans, which I don't really love. So, being the thinker that I am, I decided that chickpeas would be about 100 times better along with some extra spices. So, I set to work making a most tasty ball. But, what to serve with chickpea ballz? Pasta! What else? Haha. I had 2 jars of marinara in my cupboard, but I really wanted to test my kitchen skills and make my own. So I did. And, I could not believe how easy it was. And, get this: I actually used whole wheat penne...and liked it. I never used to like whole wheat pastas! Maybe I am growing up after all? NAH.

    Chickpea Ballz Ingredients: (mine made 19 ballz)
    • 2 cups cooked chickpeas
    • 2 TB olive oil
    • 2 TB Braggs liquid aminos 
    • 1 1/3 TB steak sauce
    • 1 TB or more minced garlic (I ran out of fresh and so used jarred)
    • 1/2 tsp fresh lemon juice
    • 1 1/2 tsp garlic powder
    • 1/2 tsp oregano
    • 1/8 tsp thyme
    • 1/4 tsp dried basil
    • 10 leaves fresh basil, minced-ish
    • 1/2 cup plain bread crumbs
    • 1/4 slightly heaping cup vital wheat gluten
    Chickpea Ballz Method:
    1. Preheat oven to 400 degrees F. Lightly oil a rimmed baking sheet and then set aside.
    2. I threw my chickpeas into a food processor and pulsed a few times until there were no whole chickpeas, but a they were also not pureed, either.
    3. Remove from the processor into a large bowl. Add in oil, Braggs, steak sauce, garlic, lemon juice, garlic powder, oregano, thyme, dried and fresh basil. Mix/mash together with a fork.
       
    4. Now use your hands to mash in the bread crumbs and gluten until well combined. Let set a minute or two for the gluten to start bonding a bit. I mashed mined down in the bowl. I don't know why, I'm just giving the facts!
    5. Now, use your paws to scoop out enough to make the size of a walnut in its shell. Maybe 1 1/2 TB? I don't know. Then squeeze the chickpea mix into a ball and set on the oiled baking sheet. Be sure to make them all roughly the same size so they cook about the same amount of time.
    6. Once all the ballz are made, you'll bake them for about 15 minutes. Then use tongs to flip them over and cook another 8-10 minutes. You want them lightly browned. 
    The ballz are great solo, but they are also great either dipped in a little steak sauce or into some marinara, like so: 

      Marinara Ingredients:
      • 1 - 14oz can diced tomatoes, partially drained
      • 1- 8oz can plain tomato sauce
      • 1/2 of a 4-oz can tomato paste
      • 1 TB oregano
      • 1/2 TB basil
      • 1 tsp onion powder
      • 1/2 tsp thyme
      • lots of pepper
      • some garlic salt
      • 1 TB garlic powder
      • 2 TB Braggs liquid aminos
      • 1/2 tsp coriander
      • 1/4 tsp red pepper flakes
      • 2 TB sugar
      Marinara Method:
      1. Heat a medium saucepan over medium-high heat. Add the diced tomatoes. Cook for about 15 minutes, stirring occasionally. This cooks your tomatoes down a bit to make them more sauce-friendly.
      2. Reduce heat to medium, then stir in the tomato sauce.  I also added all of my spices except the salt and the Braggs. Stir again to make sure the spices are incorporated.
      3. After about 5 minutes, I whisked in the tomato paste and Braggs. Let simmer away for another 5 minutes. Then taste test! I needed to add sugar to mine as it seemed too acidic. So, I added 1 TB at a time and a bit of salt to the mix. You can add any other spices or herbs you'd like. See!!! It is so easy a child could do it. Well, not really that easy, but you get the picture.

      24 January 2011

      Pasta Fagioli: The pasta no one can pronounce

      I was ecstatic a few days ago when a trip to WholeFoods resulted in a bulk purchase of dried cannellini beans. I've been looking for these buggers for months, and no local stores ever had them. So, when I found them at WF, I squealed with delight. No, really, I did. I was just so excited to finally find what I started to think of as "The Holy Bean Grail." I began to think they didn't even actually exist, but were some mythical bean people spotted like the Loch Ness Monster or Bigfoot. Anywhoooo

      I soaked the beans over Saturday night and cooked them up last night to go into one of the easiest, most tasty pasta dishes I've had at home (or anywhere, for that matter) in a while. And it's mega cheap since most people who cook regularly have the ingredients on hand already. Except, I ran out of tomatoes and sauce a few days ago, so I had to buy those. So, whatever. You can really use any pasta you want, but I had penne rigate, which is my personal favorite. I should add now, before I forget, that this is partly someone else's recipe, but, of course, I added my own changes to fit my own tastes. I borrow recipes sometimes from LiberalPortions as we seem to have very similar tastes and his recipes are rockin. I was stumped about what I wanted to make with my beans, and he helpfully suggested this dish. So, thank you, or whatever.

      This is my version, which is plenty for 2-3 massive servings. Goes really well with a nice garlicky bread, too.

      Ingredients:
      • 1/2 lb of your fave pasta, mine is penne
      • 1- 14oz. can of diced tomatoes and the juices
      • 1 to 1 1/2 small can(s) of tomato sauce 
      • 5 cloves garlic, minced
      • 1/2 medium-sized onion, diced
      • 1 TB olive oil
      • 1 tsp dried oregano
      • 1 tsp dried basil
      • 1/2 tsp thyme
      • 1/2 tsp garlic powder
      • 1/2 tsp onion powder
      • 1/8 tsp red pepper flakes
      • 2 TB Braggs liquid aminos
      • 1 1/2 cups cooked cannellini beans
      • pepper and salt to your tastes, I like kind of a lot of pepper.
      • 7-8 large, fresh basil leaves, shredded or what have you
       Method:
      1. Put your pasta in some salted, boiling water. Cook according to the directions. Then drain and set aside.
      2. Meanwhile, you will heat the oil in a large skillet over medium heat. Add the onion, and cook until translucent, about 6 minutes. Then add in the pepper flakes and minced garlic. Cook 2 minutes.
      3. Add the tomatoes and the liquid to the skillet. Stir around to combine. Let this bubble/boil away for about 12-15 minutes.
      4. Stir in the spices, Braggs, and sauce. Test for flavor and adjust as needed. 
      5. Add in the beans and pasta. Stir well and turn heat to low and simmer for a few minutes. Stir in the fresh basil leaves. Cook 2 minutes, then it's done! 
      Easy peasy. And yummy, yummy, yummy! 

      16 January 2011

      Tempeh Bacon Sandy - aka TLT

      Who doesn't love a good, smoky BLT, I ask? Well, vegans. But, many do enjoy bacon substitutes... sometimes. Alright, alright, I have a confession. I used to be scared as hell of faux meats, and still kind of am. Really. Leave me alone. I had a serious aversion to meat back in the day, so my meat aversion carried over into the faux meat category; sue me. My view on fake bacon changed somewhat when I went to The Pulse Cafe in Somerville, Mass and tried their TLT. Whoa. Holy yummy. That shit was life-altering to this scaredy cat.

      When I got back home, I asked around and got a suggestion for making a smoky-flavored tempeh since I can only buy plain tempeh locally. It sounded like a pain to marinate for hours, but, really, I was just being a crybaby. It was fucking easy. You cut the tempeh, mix the marinade, put it in the fridge and then put it in the oven. Easy. Don't be lazy. *whip cracking*

      If you're looking for crunchy bacon, well, I can't really help you. Maybe if you cut the tempeh super duper thin, it will work, but I don't really care as I like it kinda chewy. This recipe works to make about 12-15 slices of tempeh bacon. Maybe you can make more. Who knows!

      I absolutely recommend finding some nice sourdough for your sandy. I like to lightly spray each side of each slice with a bit of an olive oil cooking spray and then grilling (frying?) it in my nonstick skillet over medium heat to crisp it up. It should look like this:


      The recipe makes enough for at least 2 rather large TLTs in large sourdough slices. I'm only giving you my take on the tempeh bacon, as I am hoping you are not so stupid as to not know how to assemble as sandwich on your own. I hope this is not a mistake on my part. HA.

      Ingredients for Tempeh Bacon:
      •  1 - 8oz package of plain tempeh
      • 1/4 cup braggs liquid aminos
      • 2 1/2 TB apple cider vinegar
      • 1 1/2 tsp brown sugar
      • 1 1/2 tsp maple syrup
      • 1/2 heaping tsp cumin
      • 1/2 tsp chili powder
      • 1/4 tsp pepper
      • 2 1/2 tsp liquid smoke
      • sprinkle of salt 
      Method:
      1. Lay the tempeh slices in some baking dishes, close, but not touching.
      2. Get a small pot and put the liquid aminos, vinegar, brown sugar, syrup, cumin, chili powder and pepper on to a boil over a medium-high heat. Be sure to stir it well first, of course. Once boiling, mix in the liquid smoke and remove from heat. 
      3. Pour over the tempeh slices and marinate a moment. I flipped mine after about 15 minutes. Then cover with plastic wrap and put in your fridge. I think mine ended up marinating about 6 hours, though you can take yours out earlier, maybe. If not, don't blame me. I went all out on the marinating.
      4. Preheat your oven to 425 degrees F. Line a large baking sheet with parchment paper.
      5. Careful! Be gentle when transferring the bacon slices (again, no touching!) from the marinade dishes to the parchment-lined sheet. Then sprinkle the salt over top. Just a smidge else you will get hypertension. 
      6. Now put the sheet in the oven for about 10 minutes. Then, you're gonna need to get your tongs and flip the pieces over. I gave mine a quick spray with some cooking spray. I don't know why...sheesh. Lay off. Now put them back in the oven and cook about 8 more minutes, or until the pieces are all browned and stuff. 
      7. Now assemble your sandy. Though I doubt it could possibly be as good as mine! I kid. Not really.

      11 January 2011

      Chickpea Tahini Bake


      This is one of those dishes that doesn't look pretty (at all), but it tastes lovely!  I've never been much of a casserole sort of girl, so my liking this was a bit of a surprise.  I had 2 cups of cooked chickpeas that needed to be used up today, and a friend recommended that I try this recipe out.  I, of course, changed it some, as I always tend to do and then served it with a little garlic bread.  Plus, I didn't need such a humongous dish as I was the only person eating it, so I cut the measurements of the original recipe in half.  I ended up making what would be roughly 4 large servings in an 8x8 inch glass baking dish.  You really could add all sorts of goodies and spices into this casserole and I'm sure it would turn out lovely.

      Ingredients:
      • 2 cups cooked chickpeas (or 1 can of drained, rinsed chickpeas would likely work)
      • 1 1/2 to 2 cups cooked brown rice - I used brown basmati
      • 3 TB tahini
      • 3 TB water
      • 1- 14oz can of diced tomatoes and their juice
      • 1/2 white onion, diced
      • 3 cloves garlic, minced
      • 1/2 tsp dried oregano
      • 1 tsp dried basil
      • 1 tsp dried parsley
      • 1/2 tsp red pepper flakes
      • 1 TB lemon juice
      • salt and pepper to your liking
      Method:
      1. Heat your oven to 375 degrees F.
      2. Mix the tahini and water together in a small bowl until it is fully combined and has thickened.
      3. Saute the onion and garlic briefly in a skillet to soften somewhat.
      4. In an 8x8 inch baking dish, mix all the ingredients together, including the tahini mix. Taste and adjust the seasonings as you see fit.
      5. Place on the middle rack of the oven and bake about 35 minutes, until the edges are slightly browned.  See? Easy as can be.

      15 November 2010

      Penne alla Vodka -- Vegan MOFO #15


       Skimming around the internet today, I came across a number of recipes for vodka sauce, none of which were vegan, so I jumped at the chance to give the sauce a tasty makeover.  I learned the basics of making the sauce and set out on my own to make a yummy recipe for the rest of us.  I think this recipe turned out spectacularly flavor-wise, but it didn't quite reach the creaminess level I was hoping for.  I ended up not "cooking down" the tomatoes far enough because I was very hungry and impatient as I always seem to be whenever I start cooking.  Well, enough talk. Let's get started.

      Here are a few tips for my version of Penne alla Vodka:
      • Chill out and don't "pull a Meg."  Give the tomatoes and vodka enough time and heat to cook down by about half, eventually they will. 
      • I used Muir Glen Fire Roasted diced tomatoes and I highly recommend them because they have a ton more flavor than plain diced tomatoes.
      • I used soy creamer instead of dairy heavy cream, so that its not quite as thick as heavy cream would have been.  If you're really craving a super creamy sauce, you could cook down the creamer in a saucepan and whisk in a tiny bit of flour.  I haven't tried it with this recipe, but I have done it in other creamy recipes. 
      • You can leave the sauce chunky if you want, it'll still be great, but I've always had vodka sauce that was almost totally pureed.  I used a hand-held immersion blender to smooth out the sauce, leaving a few small chunks.  You could put the completed sauce in your regular blender or food processor to reach the same result.
      • Serve with some garlic bread.  Man-oh-man.  The garlic bread dipped in the vodka sauce is quite literally a mouthgasm.
      This recipe makes 2 huge servings or 3-4 smaller ones.

      Ingredients:
      • 1/2 lb penne, uncooked
      • 1 TB extra virgin olive oil
      • 1 small onion, diced
      • 3-4 medium cloves garlic, minced (I used 4 because I LOVE garlic)
      • 1/3 cup soy creamer or you could also use your favorite milk, thickened on the stove
      • 1 14-oz can of diced tomatoes and their juices (I used the fire roasted diced tomatoes mentioned above)
      • 1/4 cup vodka
      • 1/4 to 1/2 tsp red pepper flakes
      • 1 1/2 tsp dried basil (I would have used fresh if I would have had it)
      • 1 tsp garlic powder
      • 1 tsp onion powder
      • sea salt and cracked pepper to taste
      Method:
      1. In a large saucepan, heat the oil and red pepper flakes over medium heat.  Heat about 3 minutes.
      2. Once the oil is nice and hot, add your onions and stir around.  Cook about 5 minutes, until the onions are translucent and softened.
      3. Then add in the garlic and cook another 2 minutes.
      4. Add in the vodka and tomatoes with their juice.  Be careful here.  If your pan is too hot, your vodka may catch fire.  I added the vodka slowly to avoid that.  Add the basil, onion powder and garlic powder and mix well.  Then bring to a boil until the liquid cooks down by half.  I probably cooked mine about 10 minutes on medium heat, which wasn't long enough.  You could also turn up the heat to speed this up a bit.
      5. Bring a separate pot of salted water to a boil.  Add your pasta and cook according to the package directions.
      6. After your tomato sauce thickens, stir in your creamer.  Cook about 5-10 minutes, stirring occasionally.  I brought mine back to a boil for a bit while I cooked my pasta.
      7. Drain pasta and put into a large bowl.  I dropped a TB of Earth Balance onto the pasta and tossed it gently. 
      8. Pour your sauce onto the pasta and gently toss to coat all of the noodles.  Serve up with some garlic bread and enjoy :)

      12 November 2010

      Quesadillas & Guacamole -- VeganMOFO #12


      I made a pot of delicious soup yesterday and, yes, I do have leftovers to eat.  But, I got an idea in my head that I just couldn't get out.  I needed to make a quesadilla...yes NEEDED.  I already had all the supplies here: Daiya, tortillas, vegetarian refried beans, and an avocado that was quickly becoming too ripe.  Avocados are around $2.00 each here, and I just can't let them go to waste.

      Actually, I hate letting any food go to waste, especially after reading about the huge amount of food wasted in the US - food that could go toward feeding the hungry.  And, truthfully, I worked hard for my grocery money and I don't want to throw it in the trash.  Avoiding food waste also makes me get creative with my meals because I start putting stuff together that I may not have thought of before.  I put a bit of lettuce on my quesadilla tonight and I wouldn't have thought of it if I hadn't been trying to use up some leftover iceberg.

      This recipe makes 2 six-inch quesadillas.

      Ingredients:
      • 4 six-inch flour quesadillas
      • 1/2 of a can of vegetarian refried beans (the "traditional" beans have lard in them...ick)
      • 1 ripe avocado, peeled, seeded and mashed in a bowl
      • 4 green onions, sliced into rounds (I used the white and light green parts only)
      • 2-3 white button mushrooms, thinly sliced
      • 1/3 cup of Daiya shreds, but you can use any brand and amount that makes your happy (I used the cheddar and mozzarella combined)
      • 1/4 cup salsa of your choice
      • 1/2 tsp lemon juice (optional)
      Method:
      1. Mash your avocado in a bowl with a fork.  Add about half of the green onions and the salsa.  It's my guacamole cheat for when I don't plan it out better.  Add the lemon juice and mix well.  Set aside.
      2. Lightly spray a nonstick frying pan.  
      3. Spread half of the beans on one tortilla and half on another.  Put one of them in the frying pan, bean side up, obviously.  Sprinkle some mushrooms and green onion on the beans, and gently press them down.  Then add half of the Daiya and top with a tortilla.  
      4. Cook over medium heat for about 3 minutes, then carefully flip the quesadilla over and cook another 2-3 minutes, or until your tortilla is golden and a bit crispy on each side.  Here's where I added the lettuce.  I very gently peeled the tortillas apart and slipped some lettuce inside and put it back together again.  It gives the quesadilla a nice bit of crunch.
      5. Repeat the process with the other tortillas.  I've found that the easiest way to cut quesadillas is with a pizza cutter.  Serve with the cheater's guacamole.